
Use the video and step-by-step drawing instructions below to learn how to draw the Phineas and Ferb character Phineas. A new cartoon drawing tutorial is uploaded every week, so stay tooned!
Intro: When learning how to draw the Phineas and Ferb character Phineas, start off with a pencil sketch. In the beginning stages, don't press down too hard. Use light, smooth strokes for sketching.
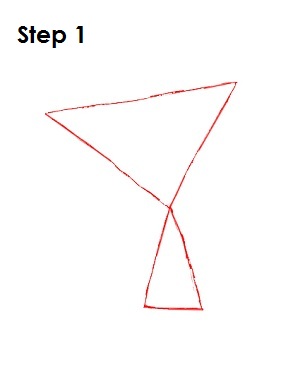
Step 1: To draw Phineas, start with a slightly tilted upside-down triangle on the top part of the page. This will be the basic shape for Phineas' head. Directly underneath that triangle, draw another thinner, smaller triangle with its point pointing up. This will be the basic shape for Phineas' body and will help you when you're learning how to draw this Phineas and Ferb character's face and body details later on.
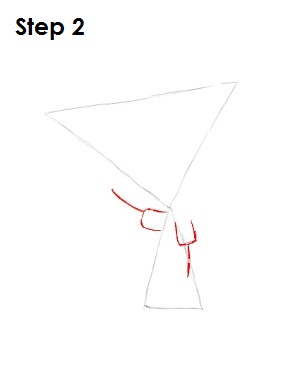
Step 2: Next, draw a squared-off letter C coming out from the top left of the body triangle. Draw a small line to the left of this shape. This is a construction guide for the arm on the left. Draw a similar shape, this time vertically coming off of the top right of the body triangle. This is the construction guide for the arm on the right.
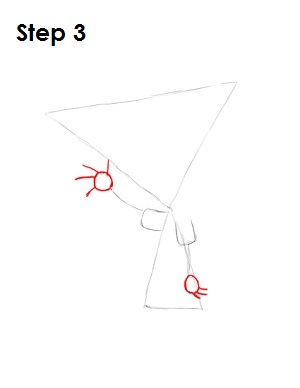
Step 3: On the ends of each of the construction guides for Phineas' arms, draw small circles. On the circle for the left hand, draw four small lines, and on the right hand circle draw three. These are basic construction guides for Phineas' hands, which will help you when learning how to draw this Phineas and Ferb character's hands later on.
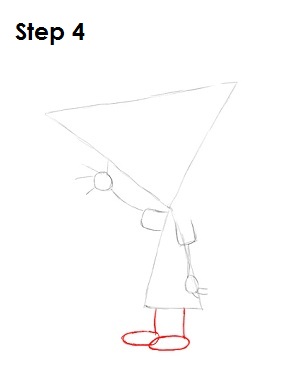
Step 4: Under the body triangle, draw two lines going vertically downward. At the end of each line draw two small ovals. These will be Phineas' legs and feet.
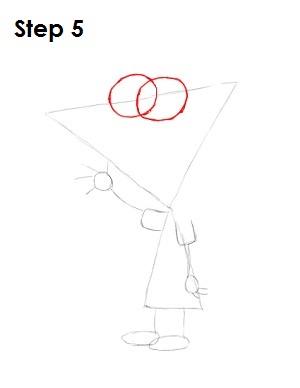
Step 5: On the top, middle part of the head triangle, draw two circles that overlap each other like Venn diagrams. These will be the eyes of this Disney Channel cartoon character.


