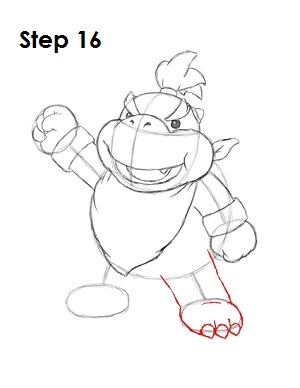
Step 16: Draw the right leg much like you drew Bowser Jr.'s arms and hands. Thicken up the line to create the base of the leg and then use the oval as a guide to create the feet. Add three pointy triangle-like shapes at the end of Bowser Jr.'s feet for his claws.
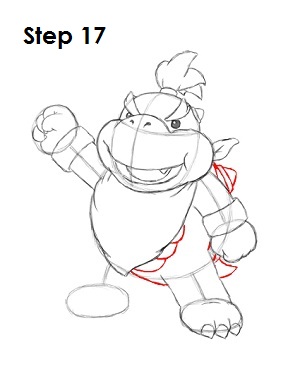
Step 17: Using the initial circle, draw the rest of Bowser Jr.'s body. A few curved lines under his bib create his chest plate. A curvy triangle below the right hand creates his tail. And a series of lines between the knot of his bib and the upper part of the right arm create his shell. Add a triangle as a spike on his shell.
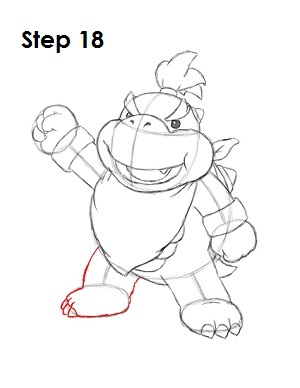
Step 18: Finally, draw the left leg using the same technique you used for the right leg. Don’t forget Bowser Jr.'s claws!
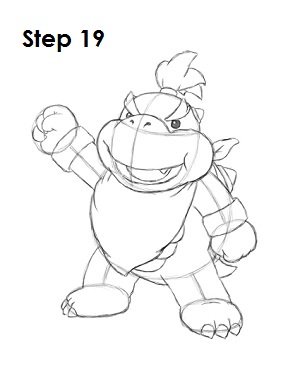
Step 19: That’s it! You now have a nice sketch of Bowser Jr. You can stop at this quick drawing for a rough, sketchy look, or continue to the step below to go for a more finished look.
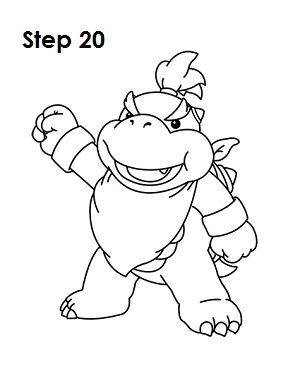
Step 20: For a more finished, inked look, carefully draw over the final sketch lines with a pen or marker. Wait for any ink to dry, and then erase your pencil marks. You now have a finished inked drawing of Bowser Jr.! You can stop here or go to the final step to complete your Bowser Jr. drawing in its entirety.
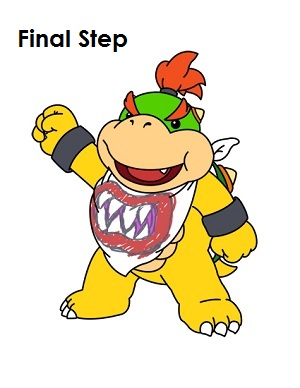
Final Step: For a completely finished Bowser Jr. drawing, you have to color it. You can use anything you want: markers, color pencils or even crayons! Color his hair and eyebrows red and his head yellow-green. His muzzle and chest plate are light brown. Bowser Jr.'s tongue is pink, and the inside of his mouth is brown. His skin is yellow and his bracelets are gray. The back of his shell is green, and his spikes are light yellow with orange bases. Draw the mouth on the bib using gray for the outline and teeth. Then color the surrounding mouth red and the bits between the teeth pink. Be messy with the drawing; it doesn’t have to be perfect. That’s it! You now have a completed drawing of a Bowser Jr. from the Super Mario Bros. games.


