Step 6: Below the quarterback's shoulder, draw the football. Pay attention to how big the football is in relation to the head. The shape of the football should be similar to an oval with pointy ends.

Step 7: On the left side of the football, draw four thin, long, oval-like shapes for the quarterback's fingers. The fingers should overlap each other and the football. They should get smaller the farther down they are. Draw a long line across the football with three smaller lines over it for the stitches.

Step 8: Under the football, draw a curved line for the visible part of the quarterback's forearm and elbow. To the left, draw a small, curved line for a bit of the bicep peeking out from behind the football.

Step 9: To the right of the head, draw a long, curved dome-like arc for the quarterback's other shoulder. Sketch lightly at first so that you get the shape right. Make the bottom part of the line flat. Under the shoulder, draw a curved line that angles to the left for the arm and elbow. Continue to draw the line up toward the face for the forearm. Make the end flat for the wrist. Draw an angled line on the right to complete the forearm and wrist sweatband.

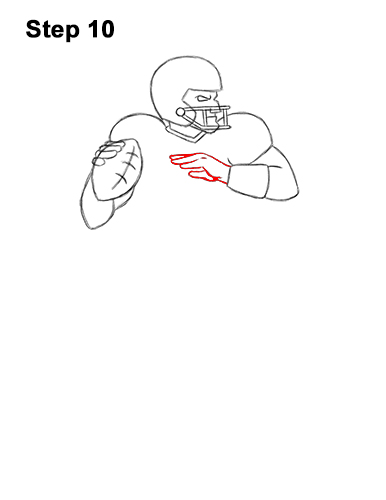
Step 10: To the left of the wrist, draw an angled horizontal line for the top of the quarterback's other hand. On the left side draw three thin, long, arc-like lines for the fingers. Take your time as this can be tricky. Close off the bottom of the football player's hand using a curved line and add another thin arc for the thumb.


