Step 6: Draw a sloping line underneath for the lower edge of the airplane's wing.

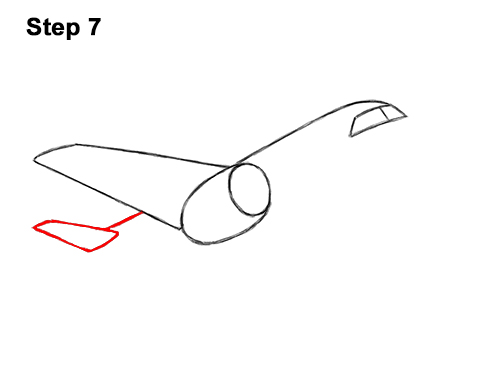
Step 7: Draw a short line to the left of the wing for the visible part of the back of the plane. To the left, draw a small, rectangular shape for the horizontal stabilizer on the tail. This shape should be similar to the wing, only much smaller.

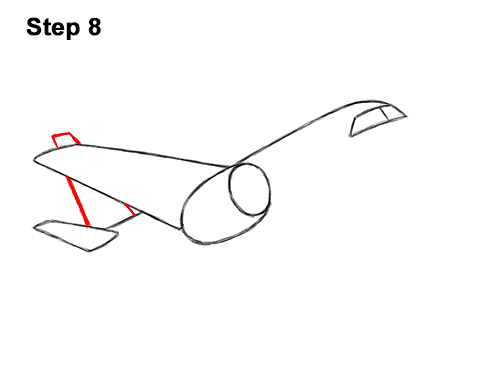
Step 8: Above that, draw a tall, triangle-like shape for the vertical stabilizer on the tail. The airplane's wing will block a big part of this section, so only draw the visible part using a few short lines.

Step 9: Below the front window, draw a big curved line similar to a backward letter C for the front of the plane. Make the top section of this shape a bit thinner and somewhat pointier.

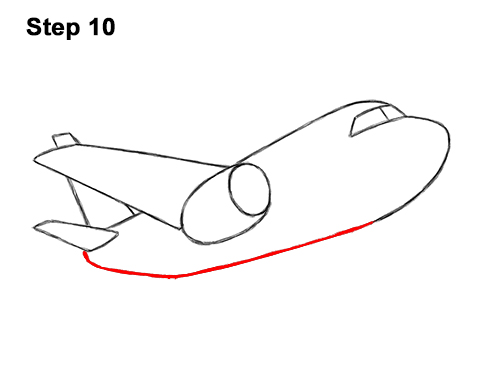
Step 10: Draw a long line that slopes to the lower, left side for the bottom of the airplane. Curve the left end of the line upward to meet the tail.


