Step 6: Directly above the eyes, draw a long, sloping line for the brim of the hat. Make the brim of the witch's hat thicker by adding a couple of extra lines at the top.

Step 7: Draw the pointy shape of the top of the hat using a series of curved lines. The witch will be flying, so the top of the hat should be slanted toward the right as the wind hits it. The hat should be wide at the bottom and gradually get thinner at the top.

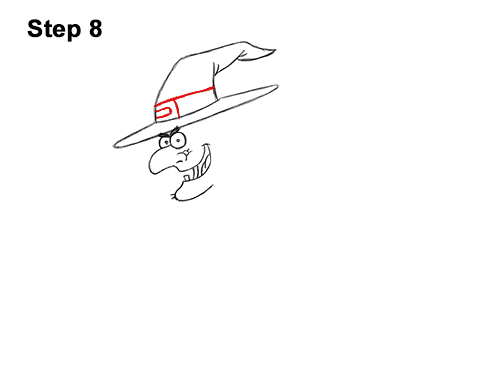
Step 8: Inside the witch's hat, draw a strap and a buckle using a series of rectangular shapes.

Step 9: Under the hat, on the right side, draw a few curved lines for the witch's hair. The lines for the hair should slope to the right to simulate the hair blowing in the wind.

Step 10: On the lower, right side of the head, draw a couple of long, curved lines for the witch's arm. The lines should slope toward the lower, left side. At the bottom, draw a few jagged lines for the tattered cuff.


