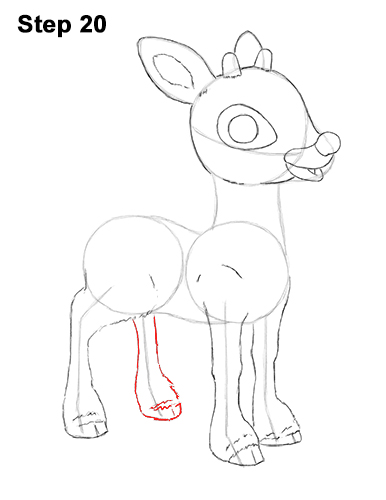
Step 20: Use the final line as a guide to draw Rudolph's other hind leg the same way. Follow the path of the guide as you draw the shape of the leg around it. Make the hoof wide and round.
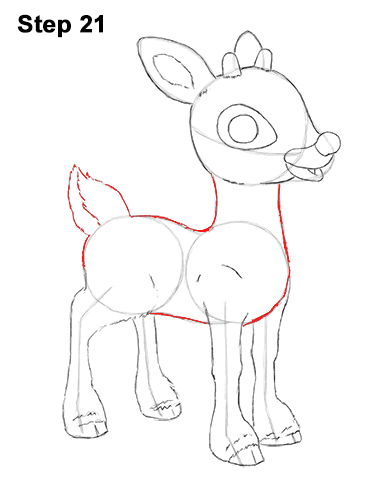
Step 21: Use the remaining lines and shapes as guides to draw the rest of Rudolph's body. Simply darken the outer edges of the initial guides to create the shape of the body. Draw the shape of his reindeer tail as a small arc with a pointy tip on the upper left side of the body. Add a line on the left side of the tail for extra detail on the fur.
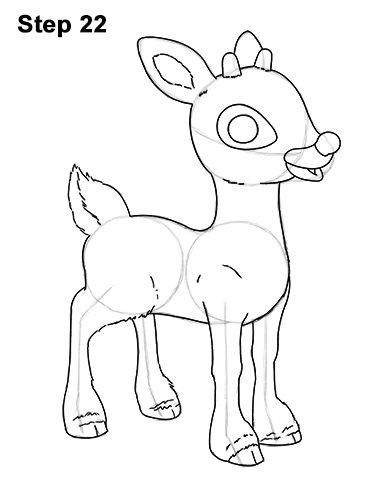
Step 22: For a more finished look, carefully go over the final sketch lines with a pen or marker.
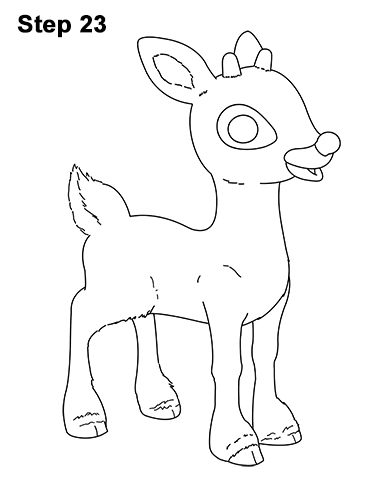
Step 23: After inking, get rid of every pencil mark with an eraser for a cleaner drawing.
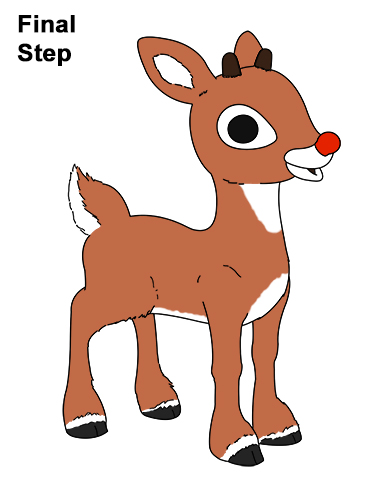
Final Step: Color your Rudolph the Red-Nosed Reindeer drawing using color pencils, markers or even crayons! Use light brown for the main part of the body. The underside of the body, the chest, and the neck should be blank. I accidentally colored in the neck too, oops! The left side of the tail and a small section above the hooves should also be blank. Use dark brown for the antlers. The pupil, the inside of the mouth and the hooves are black. Color Rudolph's famous nose red! If you colored in a section that you weren't supposed to (like I did with the neck), try to erase the color.
Thanks for visiting! Subscribe to the EasyDrawingTutorials YouTube Channel for a new tutorial every Sunday.
To learn how to draw animals, visit How2DrawAnimals.com.
RELATED TUTORIALS
 |
 |
 |
 |
 |


