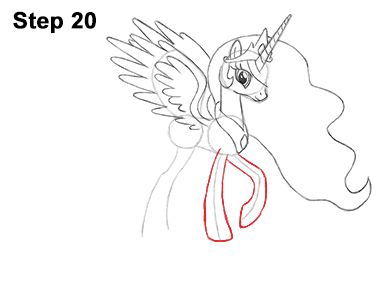
Step 20: Use the long lines on the right as guides to draw the front legs. Follow the basic path of the guide as you make the shape of the leg thicker. The bottom of the leg should be wider than the top. Sketch the legs lightly at first to get the structure right. Follow the path of the guide. When you get the shape right, darken the lines.
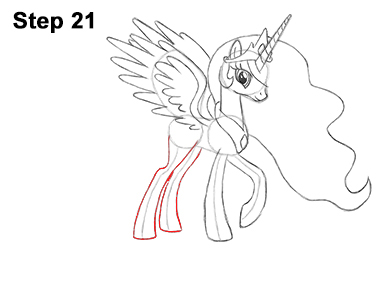
Step 21: Use the lines on the left as guides to draw the hind legs. Add a small bump on the left side, near the middle, to indicate the leg's joint. Part of the hind leg on the other side is hidden, so only draw the visible portion. The hind legs should be wide at the top and bottom but skinny near the middle.
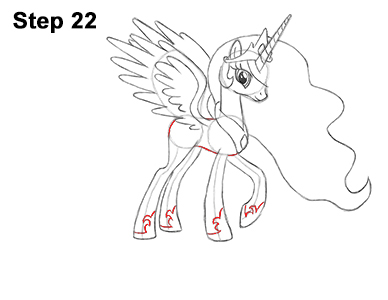
Step 22: Darken the rest of the guides to create the shape of the body. Also add the hooves at the tip of each leg using a series of small curved lines. The shape of the hooves is similar to a fleur-de-lis. Use the image above as reference to get the shape of the hooves right.
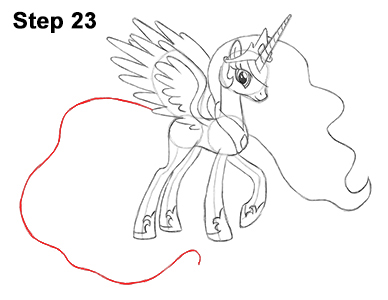
Step 23: Draw a long line to the left of the body for the top part of the tail. Make the line wavy for a flowing effect. Make the line longer for a longer tail.
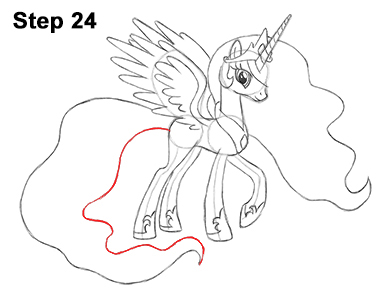
Step 24: Draw another wavy line for the bottom of the tail. Sketch lightly at first. Only darken the line when you get the shape right. The tip of the tail should wrap under the legs.


