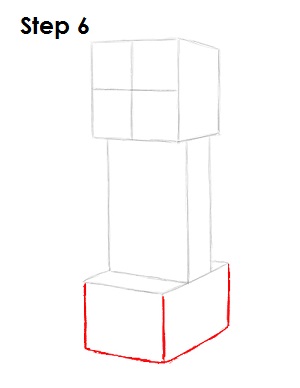
Step 6: Draw the bottom part of the Creeper's feet using more lines. Draw three lines coming down from the corners of the previous shape. These lines should be about the same size, but the middle one looks longer because of the perspective. Close the bottom part using two more lines. These lines at the bottom should be parallel to the corresponding lines at the top in order to form a cube for the feet.
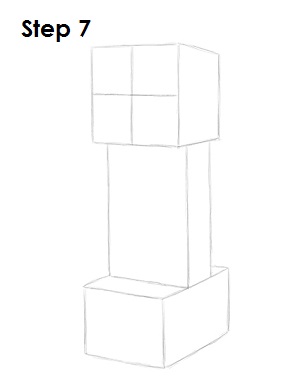
Step 7: That’s it for the initial sketch! You have the basic Creeper shape. Now go in and tighten your drawing. From this point on, press harder with your pencil in order to get darker lines and a more defined sketch.
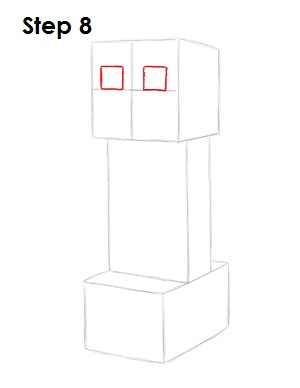
Step 8: For the Creeper's eyes, draw two small squares sitting on top of the horizontal construction line and on either side of the vertical construction line.
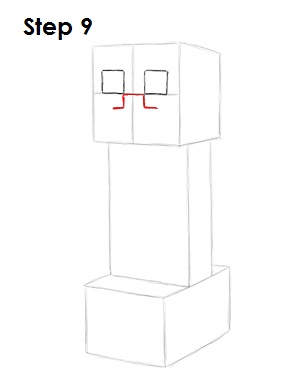
Step 9: Under the eyes, draw the top part of the Creeper's mouth using a few short lines. First draw a short horizontal line that connects the bottom corner of the eyes. Then add a couple of lines on the sides that look like the letter L. So the end result will be similar to this: ⅃¯L.
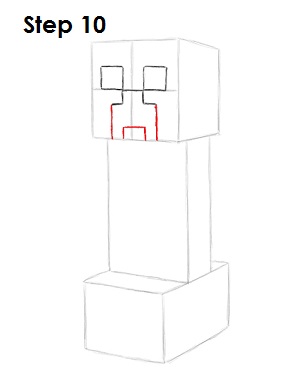
Step 10: Now add the bottom part of the Creeper's mouth. First draw two short vertical lines under the ends of the line of the previous step. Then add a small rectangle-like shape at the bottom edge of the head.


