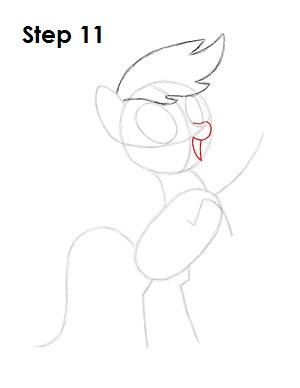
Step 11: On the lower right side of the circle and under the right eye, draw a small arc for Applejack's muzzle. Use the construction lines and the original circle as guides to help you with the placement. Under the muzzle, add a couple of curved lines to create the open mouth.
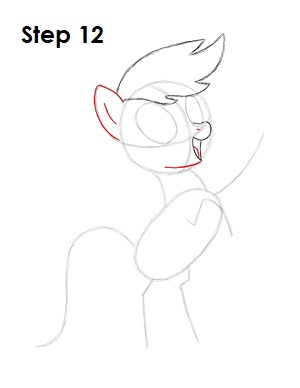
Step 12: Draw a tiny slit inside Applejack's muzzle for the nostril and a small line inside the mouth for the tongue. Add a bigger line underneath using the original circle as a guide to create the bottom part of the head. Darken the arc on top of the head and add a line within the shape to create the ear.
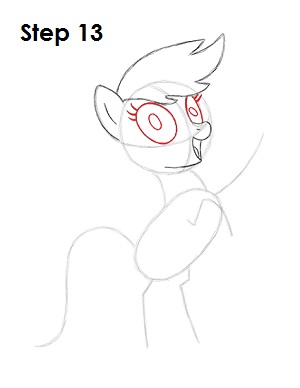
Step 13: Darken the edges of the initial ovals inside Applejack's head to create the shapes of the eyes. Add a few small curved lines on top of each eye for the eyelashes. Inside each eye, draw a small oval for the eyes' glare.
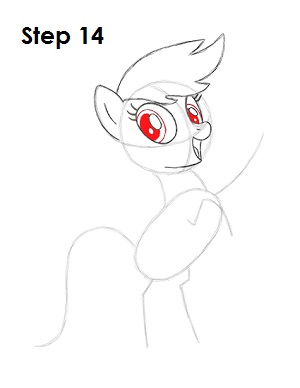
Step 14: Inside each of Applejack's eyes, draw a a bigger oval for the irises. Inside each iris, draw a smaller oval for the pupils. Shade in the pupils except for a tiny circle at the bottom to represent glare.
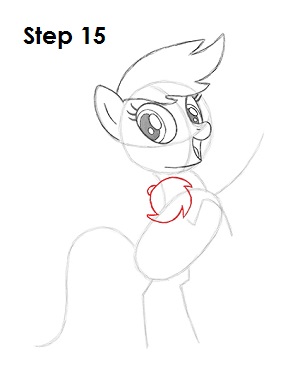
Step 15: Now draw the bottom portion of Applejack's mane. This shape should go right under the head and should overlap the neck and top part of the torso. The shape is similar to a circle with spiky edges to simulate hair. Use the image above for reference to get the shape right.


