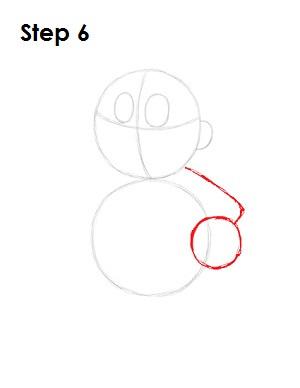
Step 6: On the right side, draw an angled line as a guide for Steven Universe's arm. The line should start under the head and bend at the tip. On the end of the line, at the bottom, draw a small circle as a guide for Steven's hand.
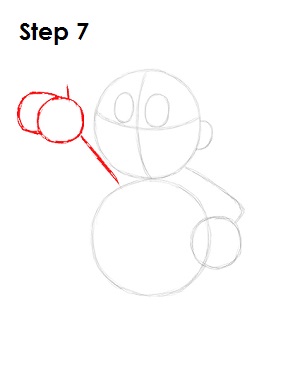
Step 7: Draw another line on the left side of the body as a guide for Steven Universe's other arm. This line should be straight with a slight diagonal orientation. At the tip of the line, draw a small circle as a guide for the hand. Add an arc to the left of the circle as a guide for the fingers and a small line to the right for the thumb.
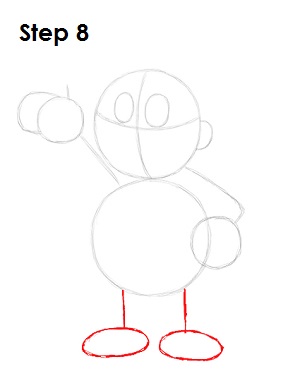
Step 8: Under the circle for the body, draw two short, straight lines as guides for the legs. Under the lines, draw two small ovals that are oriented horizontally as guides for Steven Universe's feet.
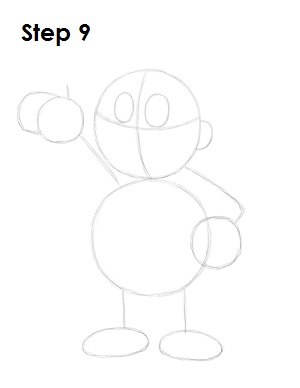
Step 9: That’s it for the initial sketch! You have the basic Steven Universe shape, now go in and tighten your drawing. From this point on, press harder with your pencil in order to get darker lines and a more defined sketch.
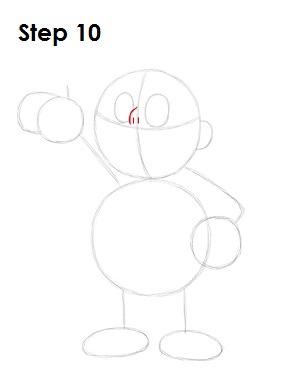
Step 10: Use the construction lines as guides to draw the nose between the eyes. Steven Universe's nose consists of a curved line to the left of the vertical construction line that partially covers the eye on the left. Add a couple of tiny slits within the shape of the nose for the nostrils.


