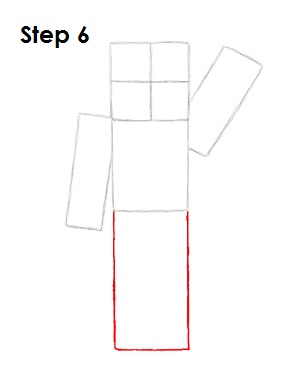
Step 6: Under the body, draw another long rectangle as a guide for Steve's legs and feet. The width of this rectangle should be the same as the head and body. The length, however, should be almost as long as the head and body combined. Don't forget to use a ruler if you want your lines to be perfectly straight.
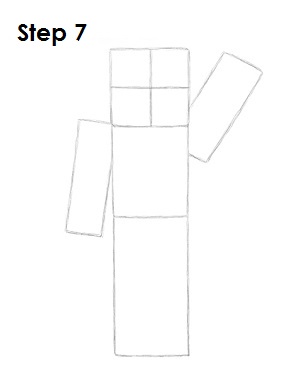
Step 7: That’s it for the initial sketch! You have the basic shape of Steve from the video game Minecraft. Now go in and tighten your drawing. From this point on, press harder with your pencil in order to get darker lines and a more defined sketch.
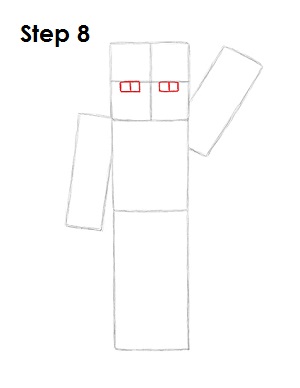
Step 8: Draw Steve's eyes inside the head, directly under the horizontal construction line and on either side of the vertical construction line. The eyes are tiny triangles with a line in the middle to create the pupils. Remember that Minecraft is made up of tiny square pixels, so Steve's eyes are basically two square pixels each. Picture two more square pixels between the eyes, and that will give you a good idea of the eyes' placement in the head.
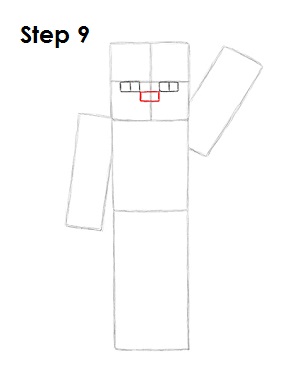
Step 9: Draw Steve's nose as a small rectangle under the eyes. The length of the nose should be equal to the length of the eyes. If you divide everything into small squares, it should be easier to figure out the placement of Steve's facial features.
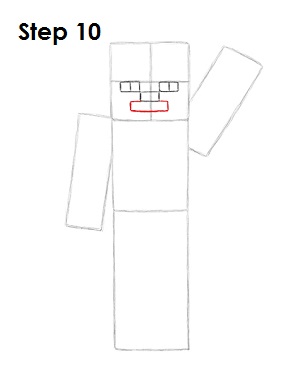
Step 10: Under the nose, draw a longer rectangle for Steve's mouth. The length of the mouth is equal to the length of the nose, plus an extra pixel-sized square on either side.


