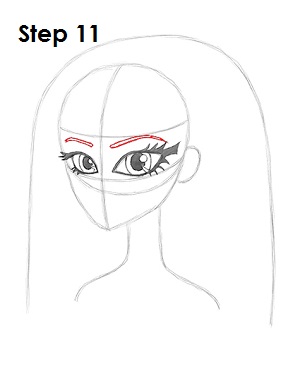
Step 11: Above each eye, draw a curved line for the eyebrows. Cleo de Nile's eyebrow on the left should be a bit smaller because of perspective.
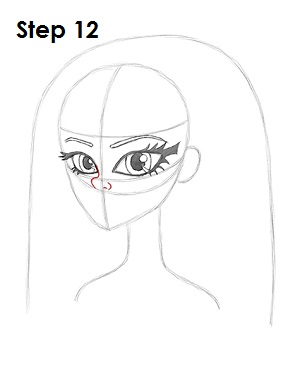
Step 12: Use the construction lines as guides to draw the nose. Cleo de Nile's nose consists of a line that starts at the eye on the left, then curves to the left and and then down and ends on top of the horizontal construction line. Add the nostril on the right side too.
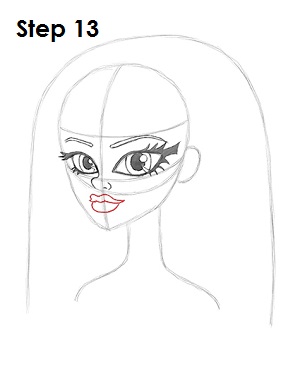
Step 13: Now draw the lips under the nose outside of the main circle. The top lip is a thick, wavy shape with the sides coming to a point. The lower lip is just a curved line under the top lip.
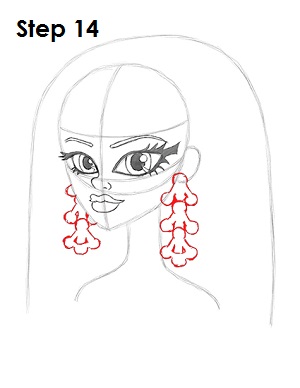
Step 14: On the sides of Cleo de Nile's head, draw a series of shapes for the long earrings. The earrings are formed by three triangle-looking shapes stacked on top of each other. These shapes have circles instead of corners. Use the image above for reference.
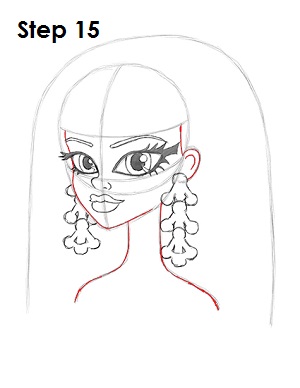
Step 15: Use the initial shapes as guides to draw Cleo de Nile's head and neck. Darken the lines as you follow the basic path of the guides to create the face, neck and ear.


