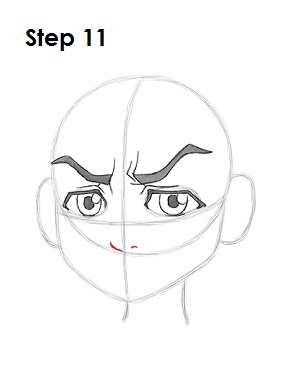
Step 11: Draw Riley Freeman's nose by using the initial lines as guides for placement. The nose is basically a curved line with an even smaller line for the nostril. Place the nose close to the bottom edge of the circle on the inside.

Step 12: Draw Riley Freeman's mouth under the nose. The line for the mouth curves down for a pouty look. Add a smaller curved line under it for the bottom lip.

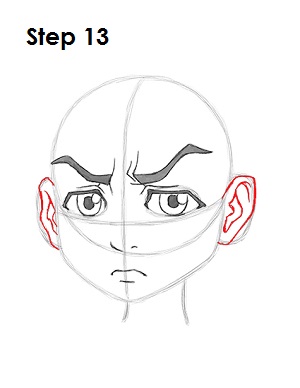
Step 13: Use the curved lines on the sides of the head as guides to draw Riley Freeman's ears. Follow the basic path of the guides but angle the shapes more as you darken the lines. Add a few more curved lines inside the shape of the ear for the inner structure.

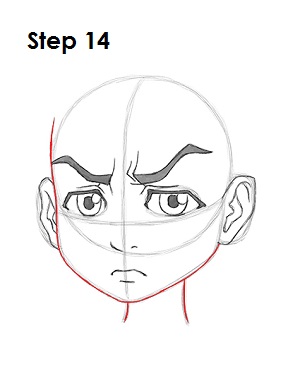
Step 14: Draw the shape of Riley Freeman's face by using the main circle and the curved line under it as guides. Simply follow the path of the guides as you darken the lines. Darken the lines for the neck too.

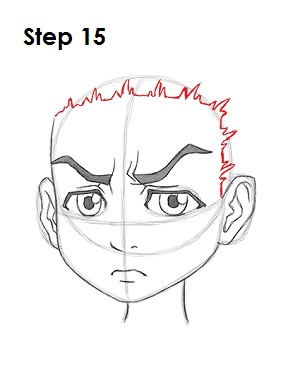
Step 15: Riley Freeman's hair is a bit tricky, so it's divided into three parts. First draw the front part of the hair as a series of zigzag lines that goes across the top part of the forehead, and then bends sharply down toward the ear. Use the sides of the main circle as a guide for placement. The zigzag lines are divided into three sets of spikes. The middle spike on each set of three should be the tallest spike because it will be the division between Riley's cornrows.


