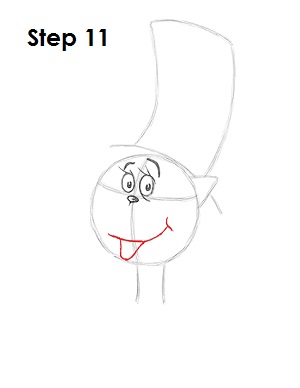
Step 11: Draw the Cat in the Hat's mouth near the bottom of the initial circle. Draw a long, curved line close to the bottom for the top part of the mouth. Under that line, draw a U shape that touches the inner edge of the initial circle. This creates the actual mouth opening. Also draw a small curved line at the right of the first long curve you drew to create the cat's cheek.
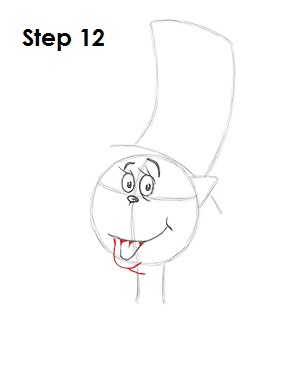
Step 12: For the tongue, draw a couple of curved lines inside the mouth, near the top. Draw another curved line under the mouth for the Cat in the Hat's lower lip and a smaller one under that for the chin.
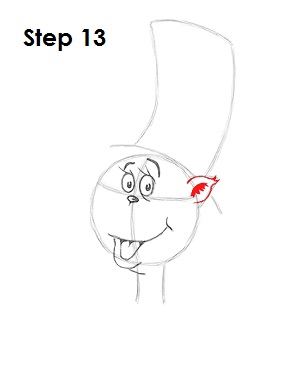
Step 13: Use the triangle-like shape on the head as a guide to draw the Cat in the Hat's ear. Make the sides of the ear rounder and draw a couple of lines at the tip. Shade a small portion of the inside of the ear.
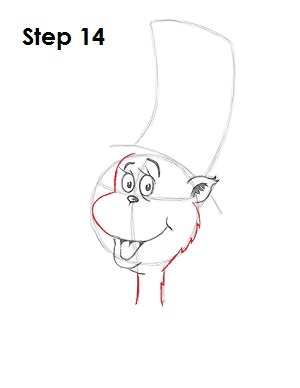
Step 14: Draw the rest of the Cat in the Hat's head by using the initial lines and shapes as guides. On the left side, the face consists of a long line that dips in toward the nose. Use the initial circle as a guide to get the shape right. When you darken the lines on the right side of the face, use jagged shapes to represent the Cat in the Hat's fur. Darken the lines at the bottom for the neck.
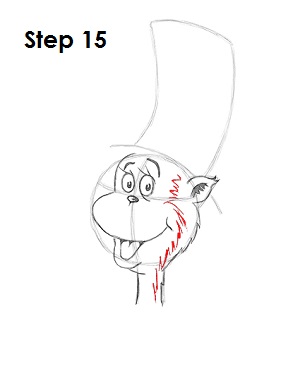
Step 15: Add the pattern of fur inside the Cat in the Hat's head on the right side as a series of short, curved lines. Dr. Seuss had a very sketchy style of drawing, so just add quick, short strokes down the entire right side of the face. The lines don't have to look exactly like the image. Don't overthink it.


