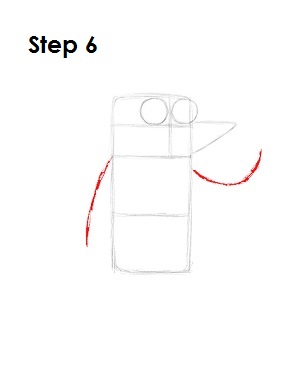
Step 6: On either side of Rigby's body, draw two curved lines as guides for the hands. The line on the left should drop down to the side of the body, and the other should point upward.
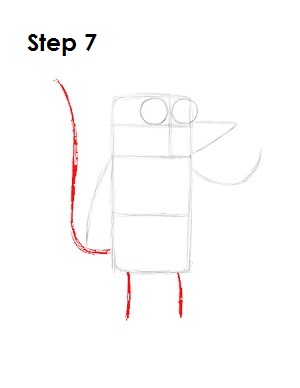
Step 7: Under the body, draw two short lines as guides for Rigby's feet. On the left side of the body, draw a long curved line as a guide for Rigby's raccoon tail.
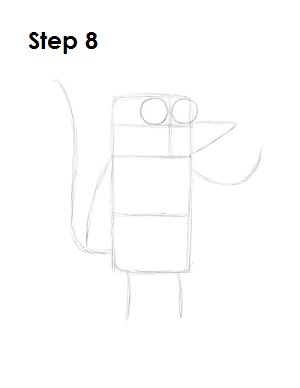
Step 8: That’s it for the initial sketch! You have the basic Rigby shape. Now go in and tighten your drawing. From this point on, press harder with your pencil in order to get darker lines and a more defined sketch.
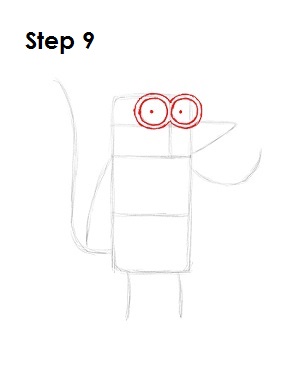
Step 9: Darken the shape of Rigby's eyes. Follow the exterior path of the two circles and draw another line to create Rigby's raccoon eyes. The end result will look like a number 8 on its side. Inside each eye draw, a small dot for his pupils.
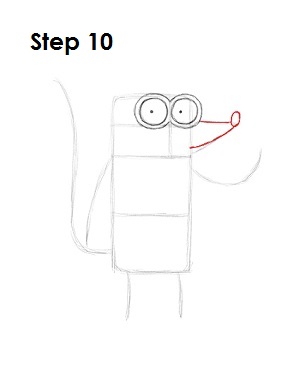
Step 10: Use the triangle-like shape on the side of Rigby's head as a guide to draw his muzzle. Follow the path of the line as you darken it but make it curve more at the bottom. On the tip of the shape, draw a small oval for Rigby's nose.


