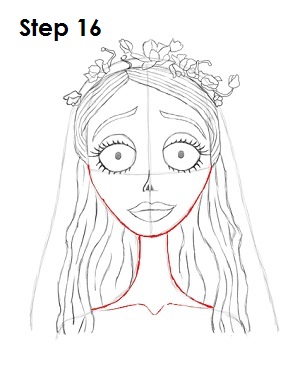
Step 16: Tighten the shape of Emily's face and neck. Draw in her collarbone below her neck. It's just two lines that meet in the middle by forming a letter V.
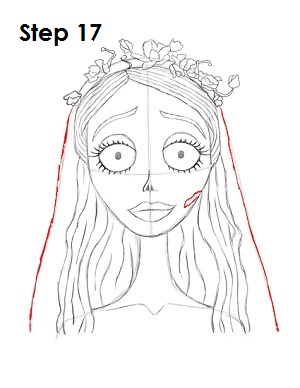
Step 17: Darken in the rest of the veil that comes down on top of the back of her hair. Draw a gash on the right side of Emily's face to represent the piece of skin she is missing there.

Step 18: That's it! You now have a nice sketch of Emily the Corpse Bride. You can stop at this quick drawing for a rough, sketchy look or go for a more finished look by continuing to the step below.
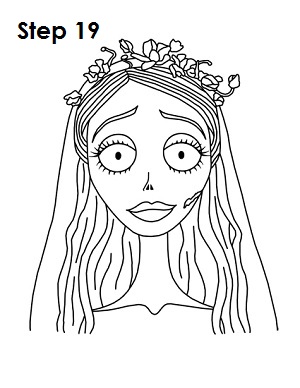
Step 19: For a more finished, inked look, carefully draw over the final sketch lines with a pen or marker. Wait for the ink to dry, and then get rid of every pencil mark with an eraser. You now have a finished inked drawing of the Corpse Bride! You can stop here or go to the final step to complete your Emily drawing.
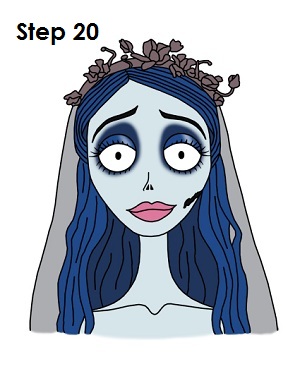
Final Step: For a completely finished drawing of Emily the Corpse Bride, you have to color it. You can use markers, color pencils or even crayons! Color her flowers a dark gray and her veil a lighter gray color. Her hair and eyelids are blue. Give her a shade of darker blue around her eyes and for the back part of her hair (the parts closest to her neck). Her eyebrows and gash are black. Her skin is a pale light blue, and her lips are pink. That's it! You now have a completed drawing of Emily from Tim Burton's Corpse Bride.
RELATED TUTORIALS
 |
 |
 |
 |
 |


