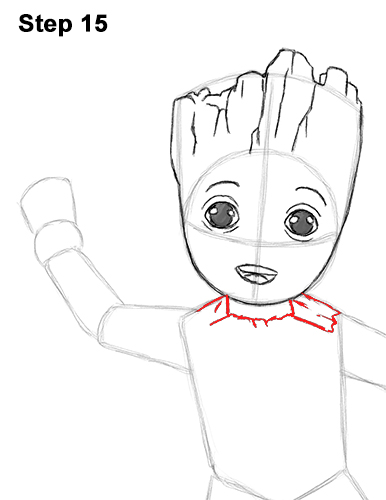
Step 15: Draw the top portion of the torso by first drawing two small lines under the head for the neck. Then add a jagged edge below the neck for the bark-like texture. Add a couple more jagged shapes on the sides of Groot's neck for more bark-like pieces.
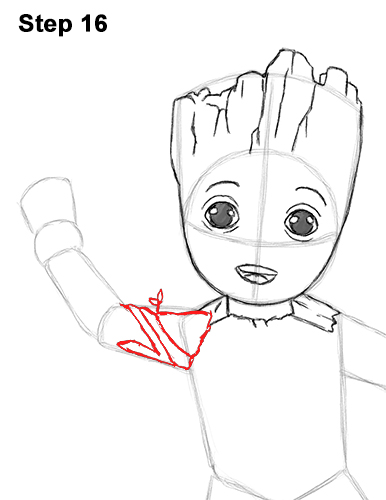
Step 16: Use the rectangular shape on the left as a guide to draw the first part of Groot's arm. Darken the outer edges of the guide and add a couple of lines inside for the vine-like shapes. The shapes inside don't have to be exact, just as long as they look like vines or bark. You can add little leaves too.
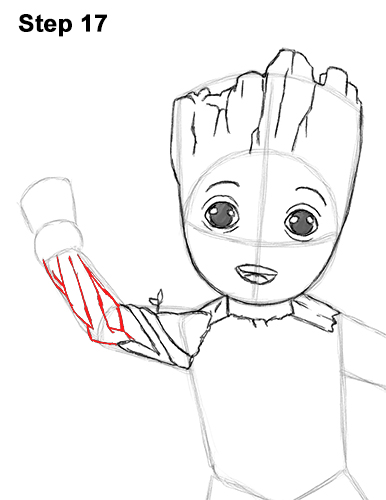
Step 17: Draw Baby Groot's forearm the same way. Use the initial shape as a guide. You can start drawing the vine- like shapes on the inside first. Then finish off the shape by darkening the outer edges.
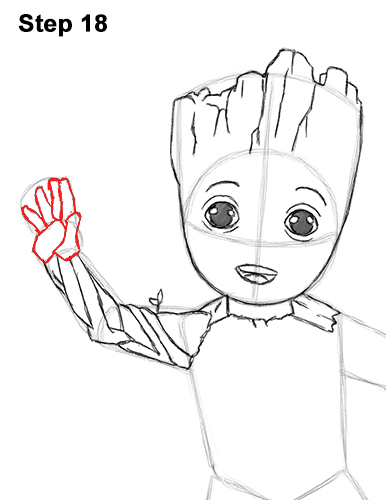
Step 18: Use the initial shape at the top as guides to draw the hand and fingers. On the bottom, right side, draw a shape similar to a rectangle with wonky sides for the thumb. Now use the guide at the very tip to draw the individual fingers as thin rectangular shapes. Be sure to make the pinky the smallest finger and finish the rest of Baby Groot's hand.
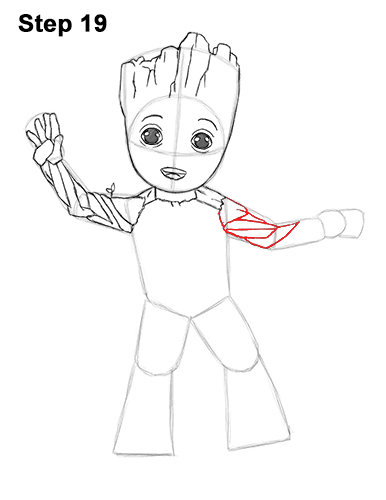
Step 19: Use the shapes on the right as guides to draw Baby Groot's other arm the same way. Draw a series of jagged shapes and vines within the edges of the guides. Don't overthink the shapes inside. Just add random long shapes within the initial guides. Curve the shapes so that they extend toward the forearm.


