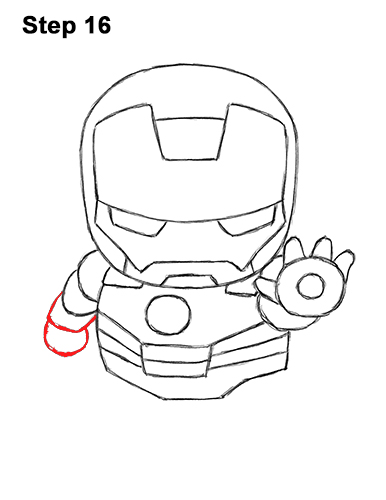
Step 16: Draw a few short lines below the previous lines for the forearm. Add a semi-circle underneath for Iron Man's curled up fist.
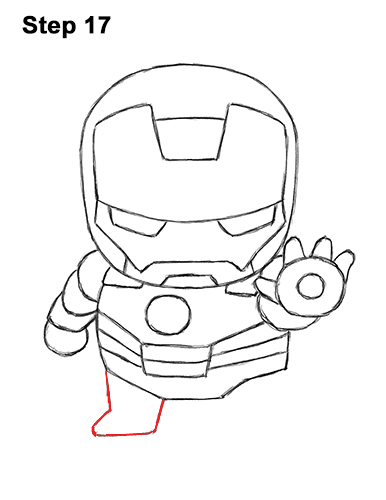
Step 17: Add the leg on the left by first drawing two short vertical lines. Now add the foot pointing toward the left using a few more short lines.
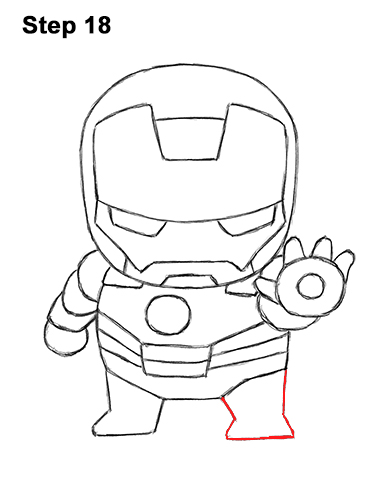
Step 18: Add Iron Man's other leg the same way. Start with short vertical lines. This foot is poining forward, so draw it using diagonal lines on the sides and a horizontal line at the bottom.
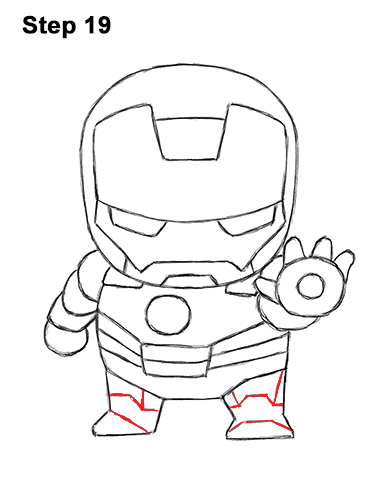
Step 19: Add a few more lines within the legs for extra detail on the armor. Use angled lines as opposed to curved lines to represent mini Iron Man's rigid metal armor. This armor consists of an angled line inside each foot and and angled line inside each leg.
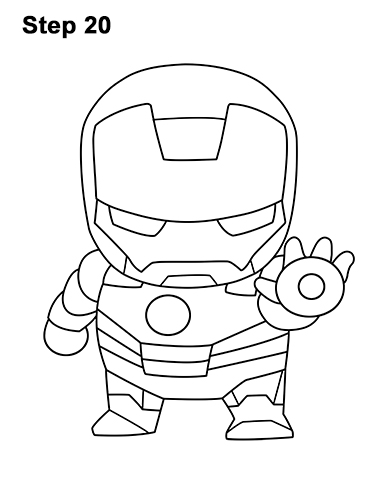
Step 20: Using a pen or marker, carefully go over the lines to make your chibi Iron Man drawing permanent. After inking, get rid of every pencil mark with an eraser.
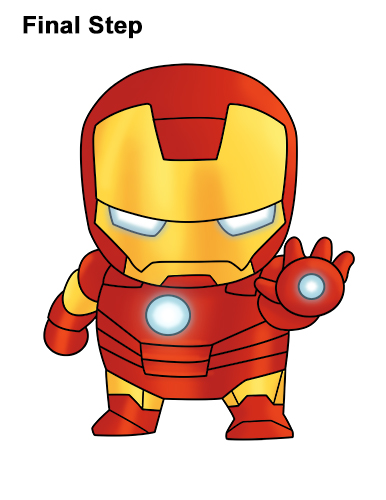
Final Step: Color your mini Iron Man drawing using color pencils, markers or even crayons! Use red for the body except for the face plate, arms and legs. Add some brown on top of the red for more volume. Use yellow for the rest of the body. Add some red-orange on top of it for highlights. Use a bit of light blue on the outer edges of Iron Man's eyes and the reactors. Don't forget to pause the video to draw at your own pace.
Thanks for visiting! Subscribe to the EasyDrawingTutorials YouTube Channel for a new tutorial every Sunday.
To learn how to draw animals, visit How2DrawAnimals.com.
RELATED TUTORIALS
 |
 |
 |
 |
 |


