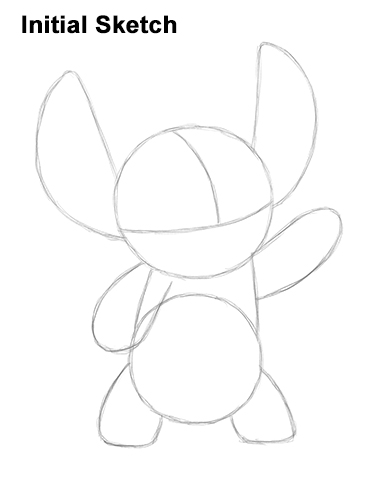
Step 6: On the right side of the body, draw a long line that curves upward as a guide for Stitch's other arm.

Step 7: Under the body, on either side, draw a curved shape as guides for Stitch's short legs. Each guide basically consists of two short , vertical lines with a horizontal line at the bottom.

That's it for the guides! For the next steps, use darker lines for a more defined drawing.

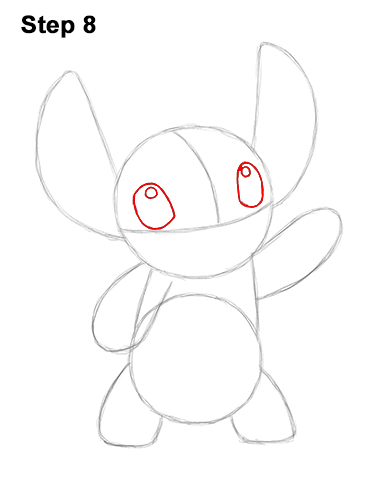
Step 8: Inside the head, lightly sketch two ovals for the eyes. Start with four small marks to determine the size of the ovals in relation to the head. As you draw the marks, pay attention to their distance from the initial guide lines. Don't draw Stitch's eyes too close together. They should be close to the opposite edges of the head. When you get the position and size of the ovals right, darken the lines. As you darken the lines, make the sides of the eyes a bit pointier. Remember to sketch lightly at first so that its easy to erase if you make a mistake. Inside each eye, at the top, draw a small circle to represent glare.

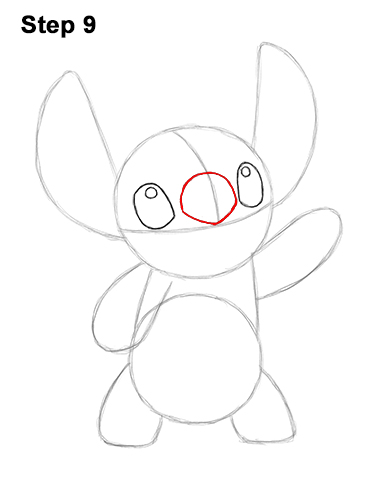
Step 9: For Stitch's nose, first make a small mark on the vertical guide line that's at the height level of the eyes. Now draw a curved line on either side of the mark for the top part of the nose. Below that, draw a line similar to a wide letter V for the bottom part of the nose.


