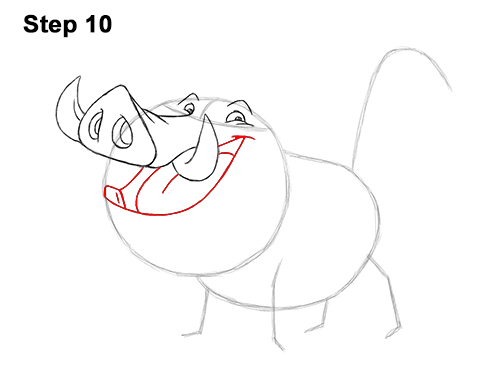
Step 10: To the right of the tusk, draw a short line that almost touches the eye for the top of Pumbaa's smile. From there, draw a long line that curves to the right and then below the tusk for the bottom of the open mouth. The left side of this line should end at the left edge of the initial circle. On the left side of the mouth, draw a small square for the tooth. To the right of the tooth, draw a curved line for the other side of the mouth and two more curved lines for the tongue.
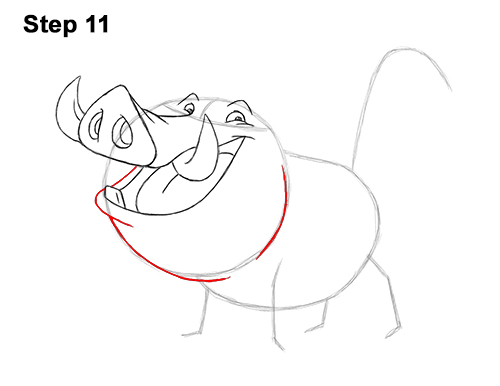
Step 11: Draw short, curved lines above and below the tooth for the lower lip. Use the initial circle as a guide to draw Pumbaa's big chin/jaw under the mouth. Follow the basic path of the initial circle as you draw the lines that form the chin/jaw.
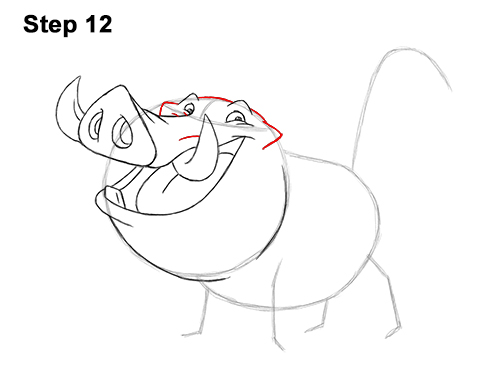
Step 12: Use the initial circle as a guide to draw the rest of Pumbaa's head. On either side of the head, draw small V-shaped lines for the cheekbones. Place the cheekbones right along the path of the initial circle. Add a few more lines inside the head for extra detail on the wrinkles.
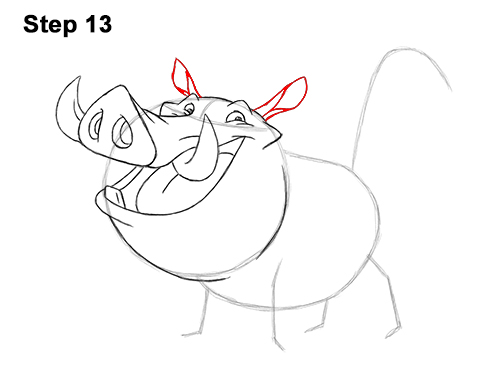
Step 13: Above the eye on the left, draw a couple of curved lines for the first ear. The ears should be long and thin, and kind of leaf-shaped. On the right side of the head, draw the other ear the same way but make it a bit longer. Inside each of Pumbaa's ears, draw a couple of curved lines for the inner ear structure.
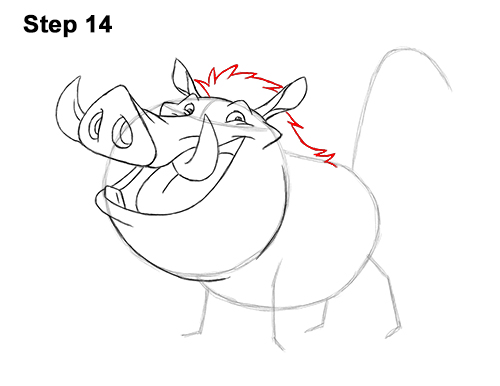
Step 14: Starting next to the ear on the left, draw Pumbaa's hair using a series of curved lines. The curved lines should end in pointy tips. Once you reach the right side of the head, make the tips bend to the right. These curved spikes represent chunks of hair. Pay attention to how far up they go and don't overlap the ear on the right. Continue to draw the curved, spike- like hair toward the right. The hair should end at the top of the body.


