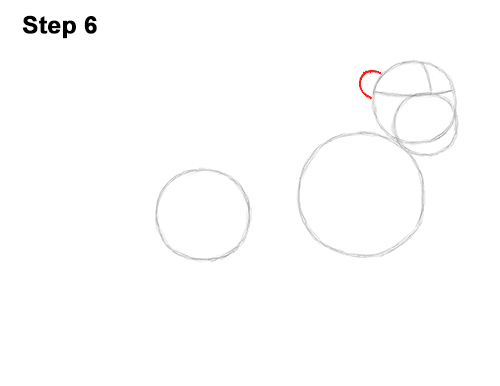
Step 6: On the left side of the head, right next to the construction line, draw a small arc as a guide for Simba's ear.
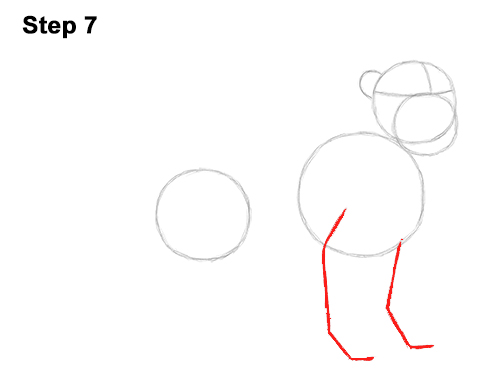
Step 7: Draw two long vertical lines under the big circle as guides for the front legs. Bend the lines slightly at the top and at the bottom to indicate where the joints and feet will be. The guide on the right should be a bit smaller because that leg will be on the other side of Simba's body.
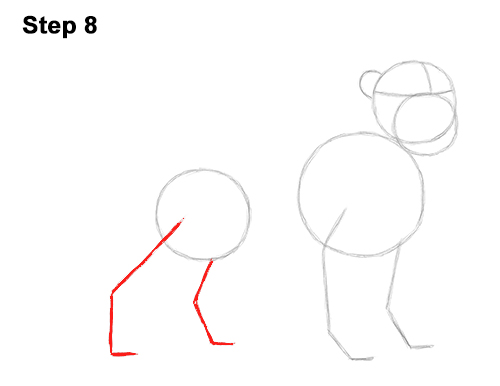
Step 8: Draw the guide for the first hind leg by drawing a line that's diagonal at the top, and then angles and is vertical at the bottom. Draw the guide for Simba's other hind leg the same way except a bit smaller and less angled.
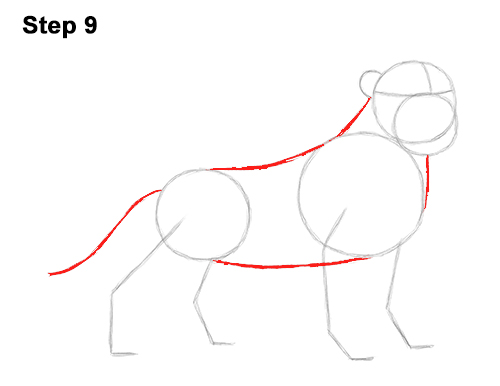
Step 9: Draw two lines that connect the lion's head to the body to form the neck. Now draw two longer lines that connect the first two circles to complete the guide for the body. Draw a long curved line on the left side of the body as a guide for Simba's tail.
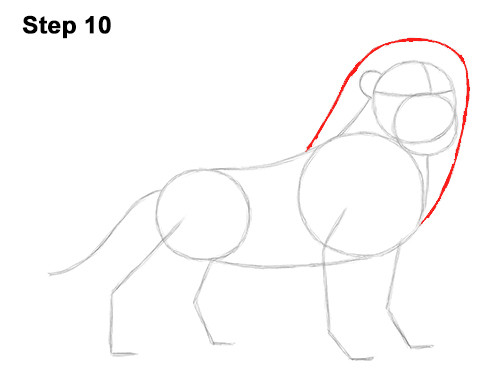
Step 10: Add the guide for Simba's mane by first drawing a small mark above the head. Now extend the mark on the left side to create a curved line that ends at the top of the body. Now curve the line on the right side so that it surrounds the head and ends on the chest on the lower right.


