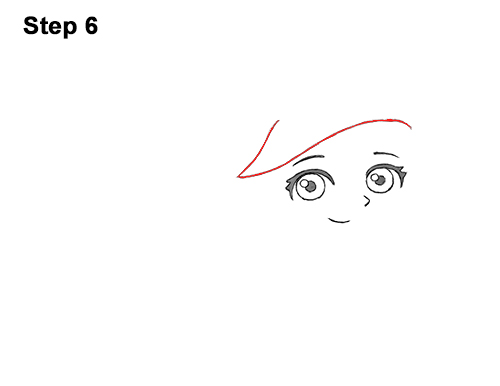
Step 6: Above mini Ariel's eyes, draw a long wavy line for the top part of her hair. The line should dip down close to the eye on the left. Add a small line on the left side to give the clump of hair a point.
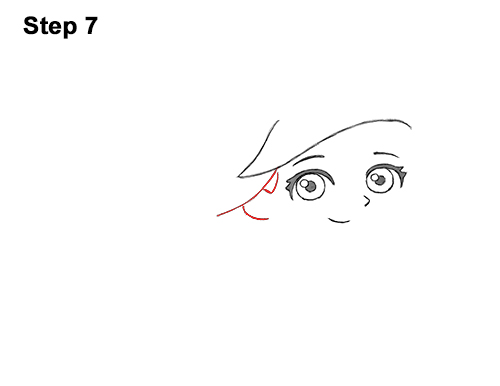
Step 7: Draw a long, curved, diagonal line on the left side for more of the Little Mermaid's flowing hair. To the left of the eye, draw a small V-shaped line for the part of the hair in front of Ariel's ear.
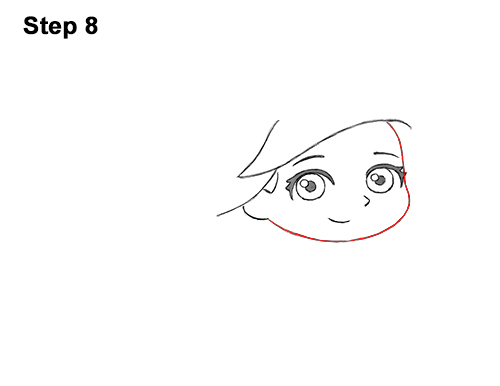
Step 8: Draw mini Ariel's head by first drawing a curved, vertical line next to the eye on the right. Curve the line more to create the cheek and add a small line below the mouth for the lower part of the head. Connect the right side with the short line below the mouth using a smooth, curved line. Then connect the bottom to the ear to finish up the shape of Ariel's head.
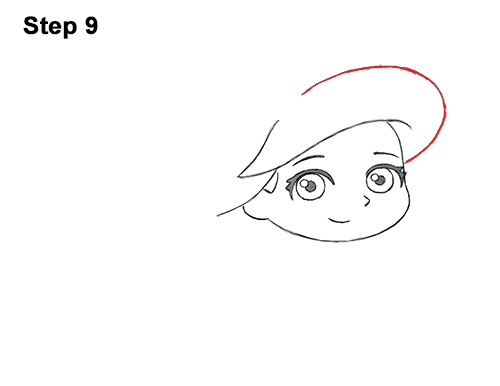
Step 9: Starting on the right side of the face, draw a long line that curves up, then to the left, for more of chibi Ariel's hair. The left end of this line should almost connect with the tip of hair created earlier.
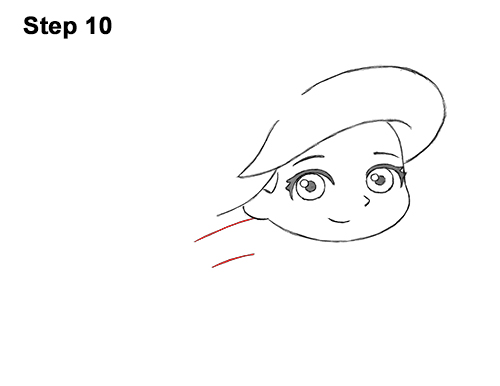
Step 10: On the lower, left side of the head, draw two curved, parallel diagonal lines for Ariel's first arm.


