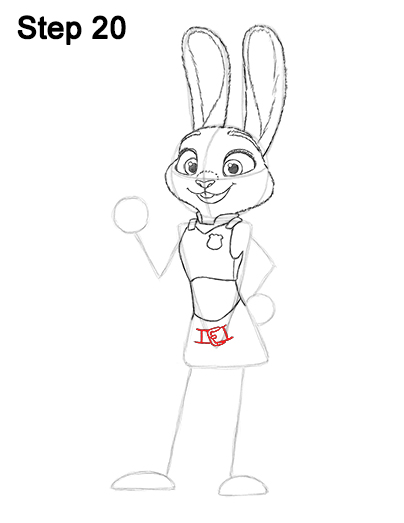
Step 20: Right under the top of the pants, draw the belt. First draw a thick C-shaped line for Judy's buckle and a small oval near the middle for the prong. Then draw a few lines on either side of the buckle for the belt's sections.
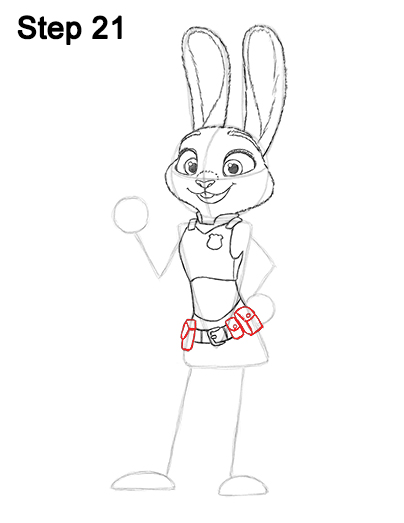
Step 21: Draw a few utility pouches on either side of the belt. The pouches are basically made up of rectangles with the corners rounded off. Add a curved line at the top for the covering flap. Draw pouches of different sizes to add variety to what Judy carries. The row of pouches and the belt should curve up and follow the same path as the top of the pants.
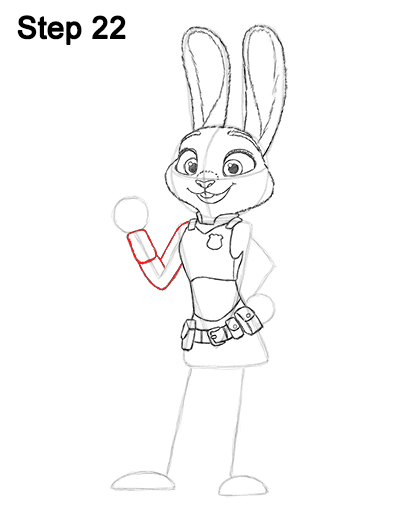
Step 22: Draw the arm on the left by using the initial V- shaped line as a guide. Draw the wrist cover right under the initial circle by creating a cylindrical shape. Now draw the rest of Judy Hopps' arm by following the basic path of the guide but making the shape thicker.
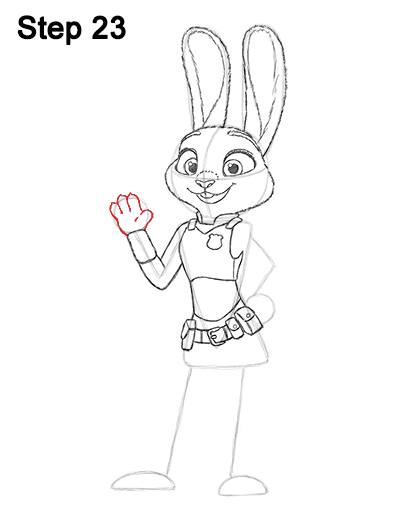
Step 23: Draw the hand on the left by using the small circle as a guide. Draw Judy's thumb as a small arc on the right side of the circle. Draw the fingers as three longer arcs near the top edge of the circle. Make the fingers round and wide and right next to each other.
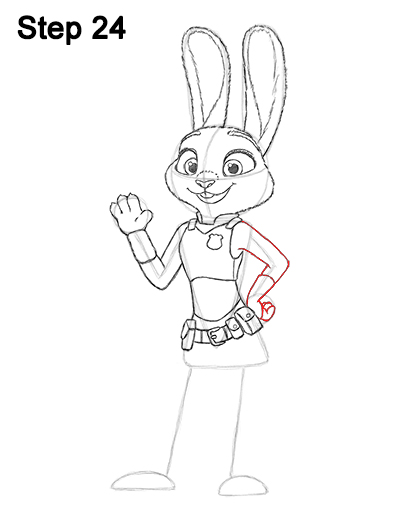
Step 24: Use the line and circle on the right side of the body to draw Judy Hopps' other arm. Make the shape of the arm thicker as you follow the basic path of the guide. The wrist should be thinner than the top of the arm. Draw a curved line on the forearm for the wrist cover. The hand is folded back, so only draw the visible portion of the fingers as small curved lines.


