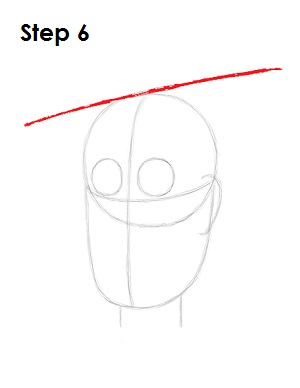
Step 6: Draw a long line on top of Woody's head as a guide for the brim of the hat. The line should be slightly tilted with a diagonal orientation.
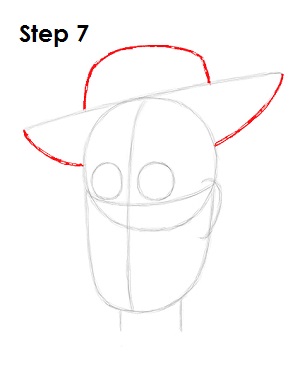
Step 7: Draw a curved line under each side of the long diagonal line to complete the guide for the hat's brim. Draw a bigger curved line on top of the diagonal line for the top pat of Woody's hat.
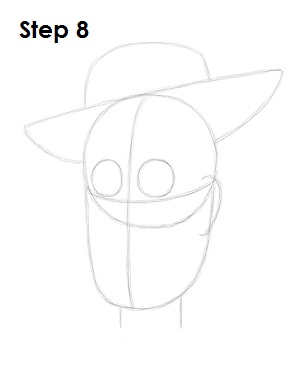
Step 8: That’s it for the initial sketch! You have the basic shape of Woody from Toy Story. Now go in and tighten your drawing. From this point on, press harder with your pencil in order to get darker lines and a more defined sketch.
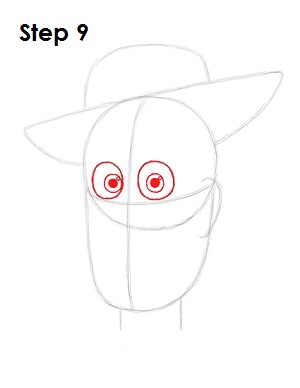
Step 9: Darken the circles inside the head to create the shape of Woody's eyes. Inside each eye, draw a small circle for the irises. Inside each iris, in the middle, draw a big dot for the pupils and a tiny circle off to the side to represent glare.
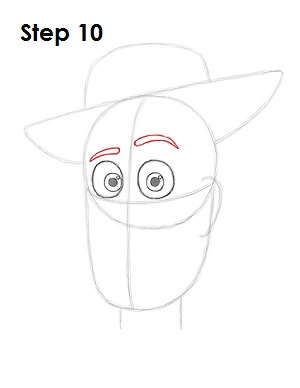
Step 10: Above each eye, draw a thin, long shape for the eyebrows. The shapes should curve and end in points. The eyebrow on the right should be higher than the one on the left to give Woody a more playful look.


