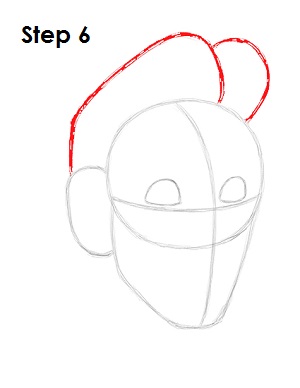
Step 6: Draw a couple of long curved lines on top of the head as guides for Hercules's hair. The line on the left starts on top of the ear, then curves up and to the right and ends on top of the head. The other curved line is shorter and should be placed on top of the head but to the right.
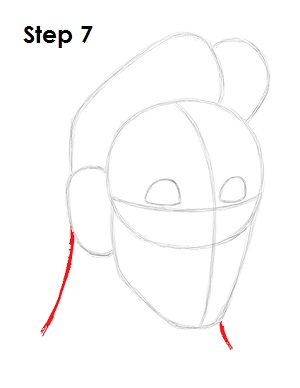
Step 7: Under the head, draw two curved lines as guides for Hercules's neck. The line on the right should be shorter because of the perspective.
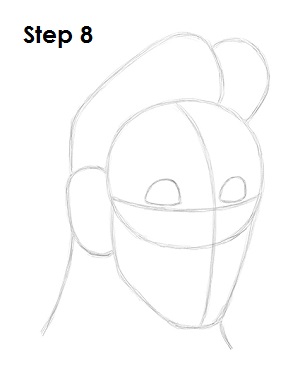
Step 8: That’s it for the initial sketch! You have the basic Hercules shape. Now go in and tighten your drawing. From this point on, press harder with your pencil in order to get darker lines and a more defined sketch.
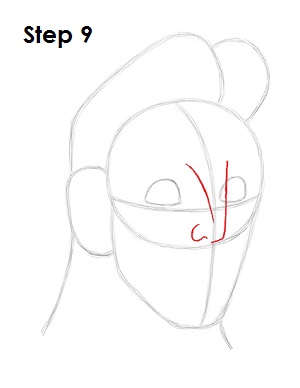
Step 9: Draw Hercules's nose by using the construction lines as guides. The bridge of the nose is a long line that overlaps the eye on the right. It curves to the left on the bottom by the lower edge of the main circle. The other line for the bridge of the nose is on the left and should have more of a diagonal orientation. Add a small curved line on the lower left side for Hercules's nostril.
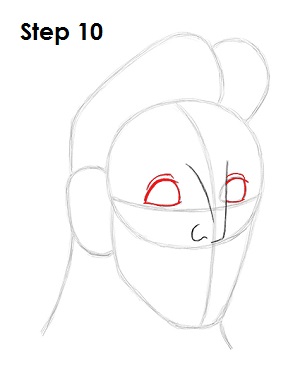
Step 10: Draw Hercules's eyes by using the initial half-circle shapes as guides. Follow the basic path of the guides but make the top edge thicker for the eyelashes. Draw an extra curved line above each eye for the eyelids.


