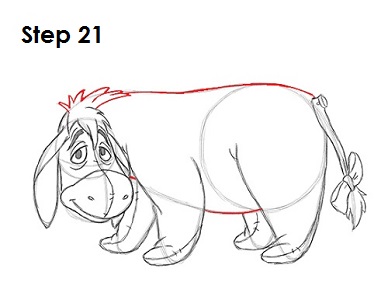
Step 21: Darken the rest of the guides to create Eeyore's body. On the upper left side, above the head, draw a series of curved lines to create the mane that extends toward the back.

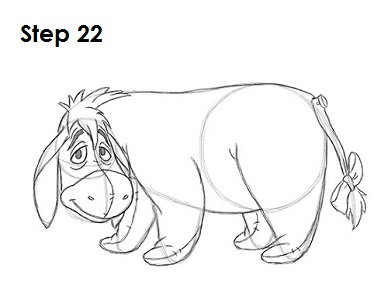
Step 22: That’s it! You now have a nice sketch of Eeyore. You can stop at this quick drawing for a rough, sketchy look or go for a more finished look by continuing to the step below.

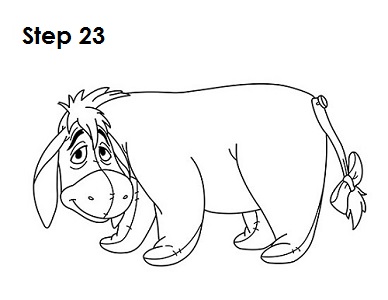
Step 23: For a more finished, inked look, carefully draw over the final sketch lines with a pen or marker. Wait for the ink to dry, and then get rid of every pencil mark with an eraser. You now have a finished inked drawing of Eeyore! You can stop here or go to the final step to complete your Eeyore drawing.

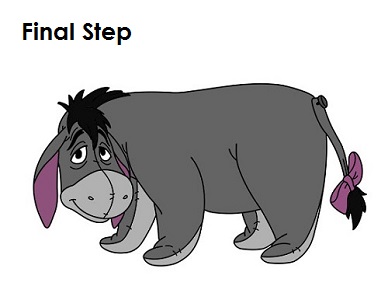
Final Step: For a completely finished Eeyore drawing, you have to color it. You can use markers, color pencils or even crayons! Eeyore's mane and and tip of the tail are black. The main part of his body is dark gray. The bottom of the feet and muzzle are light gray. If you don't have two shades of gray, simply apply less pressure on your pencil for a lighter shade. The inside of his ears and the bow on his tail are pink. That’s it! You now have a completed drawing of Eeyore from Walt Disney's Winnie-the-Pooh.


