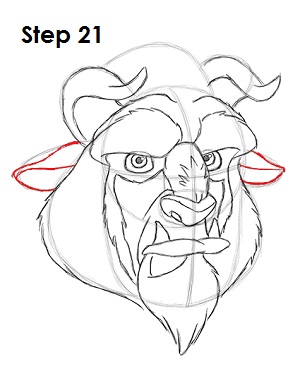
Step 21: Use the arcs on the sides as guides to draw the Beast's ears. Follow the basic path of the arcs as you darken the lines but make the ears curve down more. Draw another line within the shape of the ear for the opening.
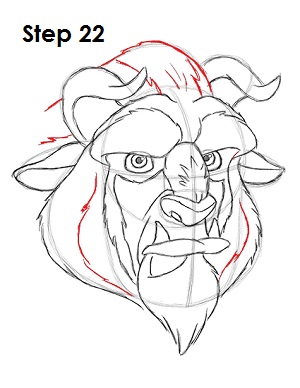
Step 22: Draw the top part of the Beast's head by using the line between the horns as a guide. Darken the line and add a few more jagged lines within the shape for a furrier texture. The line should extend to the left of the horn on the left. Add a couple more curved jagged lines on the inside of the head for extra detail on the Beast's fur.
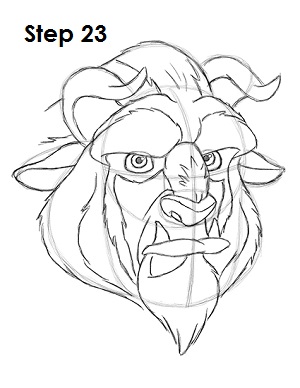
Step 23: That’s it! You now have a nice sketch of the Beast. You can stop at this quick drawing for a rough, sketchy look or go for a more finished look by continuing to the step below.
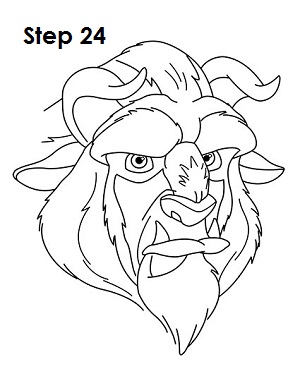
Step 24: For a more finished, inked look, carefully draw over the final sketch lines with a pen or marker. Wait for the ink to dry, and then get rid of every pencil mark with an eraser. You now have a finished inked drawing of the Beast! You can stop here or go to the final step to complete your Beast drawing.
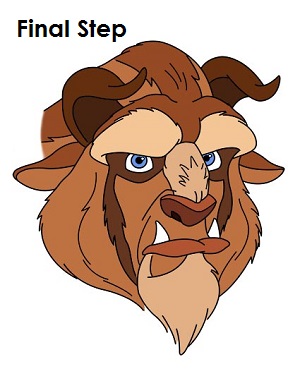
Step 25: For a completely finished Beast drawing, you have to color it. You can use markers, color pencils or even crayons! The Beast is made up of different shades of brown. The horns and the markings under the eyes are a very dark brown. The top part of the head, the nose and the lips are dark brown. The brow, the bridge of the nose and the beard are a very light brown. The rest of his fur is regular brown. If you don't have different shades of brown, just apply different pressure to get darker or lighter shades of brown. Finally color the Beast's eyes blue. That’s it! You now have a completed drawing of the Beast from Walt Disney's Beauty and the Beast.


