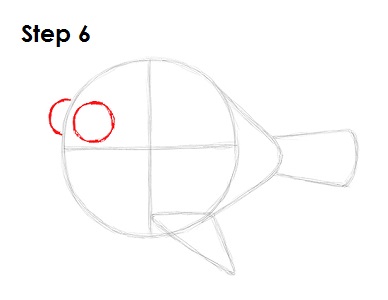
Step 6: Above the horizontal construction line and near the left edge of the main circle, draw a small circle as a guide for Dory’s eye. Outside of the main circle, draw a half circle as a guide for the eye on the other side of Dory’s head.

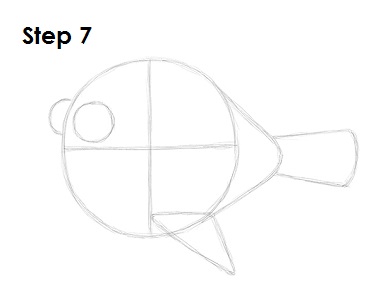
Step 7: That's it for the initial sketch! You have the basic shape of Dory from Disney•Pixar's Finding Nemo. Now go in and tighten your drawing. From this point on, press harder with your pencil in order to get darker lines and a more defined sketch.

Step 8: Darken the edges of the small circles to create Dory’s eyes. Draw a couple of lines above and below the shapes to indicate the folds around the eyes.

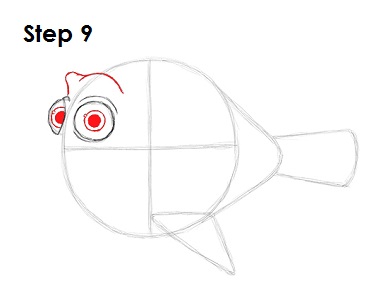
Step 9: Inside each eye, draw a tiny circle off to the side to represent glare. Behind each tiny circle, draw a bigger circle for the irises. Inside each iris, draw a smaller circle and shade it in to create the pupils. Draw two curved lines above the eyes for Dory’s brow line.

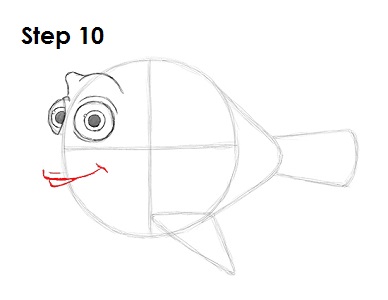
Step 10: Draw the top part of Dory’s mouth under the eyes and on the left edge of the main circle. Using the construction lines as guides for placement, draw a long curved line for the smile. Under the smile, draw a shorter line for Dory’s teeth.


