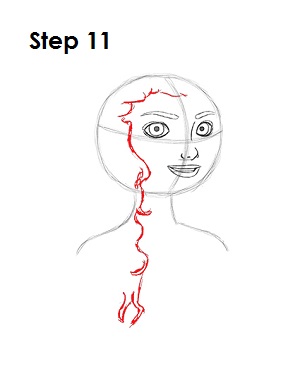
Step 11: Merida's hair can be a little tricky, so it's divided into four steps. Merida has a lot of curly hair, but don't draw every individual hair strand. Instead, draw the basic outline of Merida's hair. Start with a series of wavy lines on the left side of the head. Start the lines at the top where the vertical construction line is, then draw them down below the shoulder. The shape of the lines don't have to be exactly as in the example, just in the same general area.
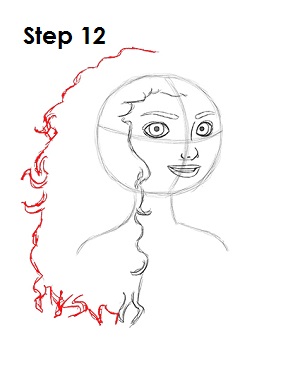
Step 12: Continue adding random squiggly lines at the bottom. You can make Merida's hair longer if you'd like. Then move up the left side of Merida's head and end the curved lines above her head.
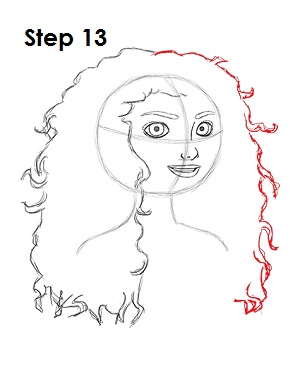
Step 13: Now draw the right side of Merida's hair by continuing the series of wavy lines where you left off in the previous step and drawing them down below the shoulder on the right side.
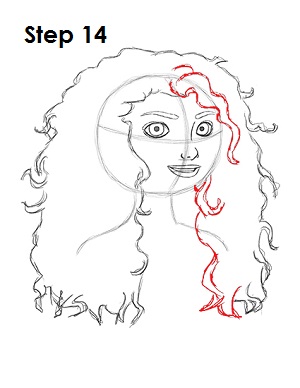
Step 14: Finish drawing Merida's hair by drawing the inside portion of it on the right side. Draw the big thick curl at the top of her head. Then draw the section under the top of the main circle that connects to the hair on the previous step. Remember the hair can be a bit tricky, so be patient as you draw it, pay close attention to the example and take your time.
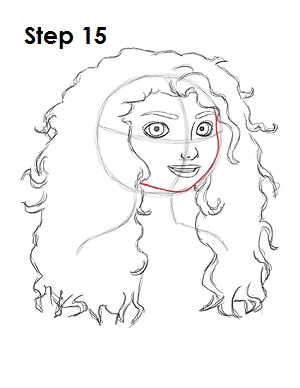
Step 15: Use the initial shape as a guide to draw the rest of Merida's face. Follow the basic path of the circle as you darken the line. Dip the line in toward the eye to create Merida's cheek and on the lower right side to create the jawline.


