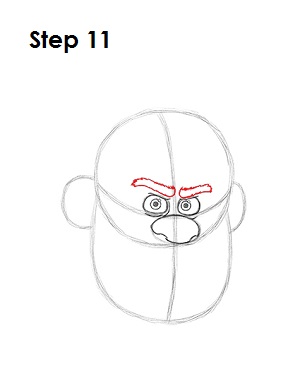
Step 11: Above each eye, draw a long shape for Ralph's eyebrows. The eyebrows should have a diagonal orientation that points toward the nose to give Ralph a furrowed brow. When drawing the shapes of the eyebrows, use quick, short strokes for a hairy texture.
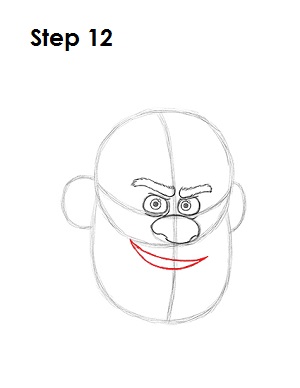
Step 12: Now learn how to draw Wreck-It Ralph's mouth. Under the main circle, draw a long, narrow shape for his mouth. The top left side of the mouth grazes the edge of the main circle for a tilted smirk.
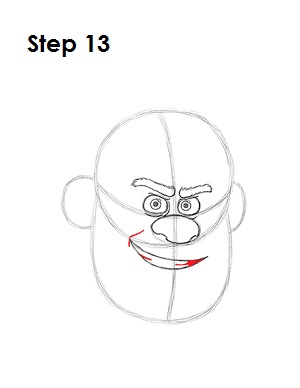
Step 13: On the left side of the mouth, draw an angled line for the smile line. Inside Ralph's mouth, draw a couple of lines on the sides to give and indication of the teeth.
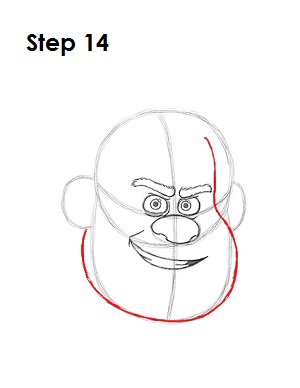
Step 14: Use the original circle and arc under it as guides to draw Wreck-It Ralph's face. Follow the basic path of the lines but make the top right side narrower and closer to the right eye. Ralph has a big jaw, so make the bottom part wider.
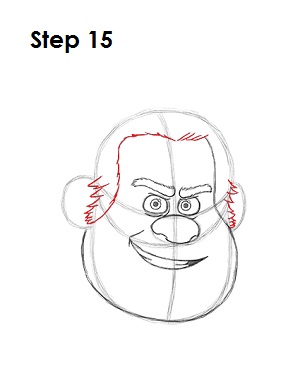
Step 15: Now learn how to draw Wreck-It Ralph's hair. His hair can be a little tricky, so it's divided into three steps. First draw the hair line high above the eyes using a series of quick, short strokes to give it the right texture. The hair line should go across Ralph's head, and then move down toward the left near the ear. Draw a bunch of small spikes on the sides of the head near the ears to create Ralph's bushy sideburns.


