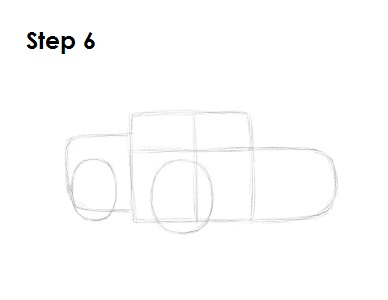
Step 6: That's it for the initial sketch! You have the basic shape for Lightning McQueen from Disney•Pixar's Cars. Now go in and tighten your drawing. From this point on, press harder with your pencil in order to get darker lines and a more defined sketch.
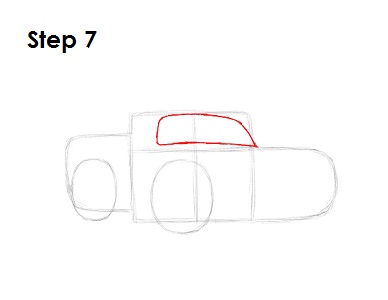
Step 7: Draw Lightning McQueen's windshield/eyes sitting on top of the horizontal construction line inside the main square. The shape of the windshield is similar to a long rectangle with a pointy end on the lower right side.
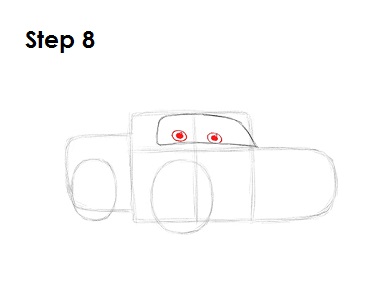
Step 8: On the lower part of the windshield and on either side of the vertical construction lines, draw two circles for Lightning McQueen's irises. Inside each iris, draw a smaller circle and shade it in for the pupils. Draw an even smaller circle in each eye to represent glare.
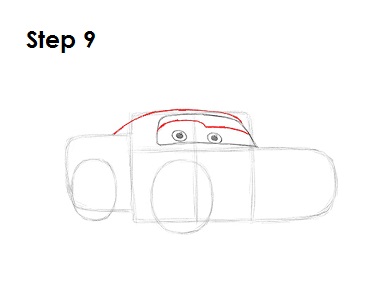
Step 9: Inside the windshield, on the top part above Lightning McQueen's eyes, draw a long wavy line for his eyelids. Use the top of the square as a guide to draw the top part of the car by drawing a line that extends to the arc on the back.
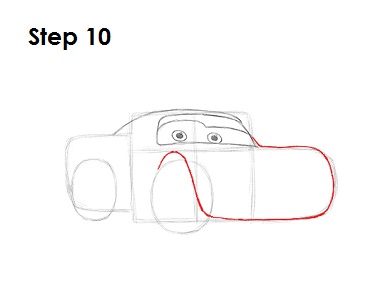
Step 10: Draw the front part of Lightning McQueen by using the arc on the right side as a guide. Basically darken the line for the arc, and when you get to the tire guide, curve the line up and across the tire, and curve the line above the tire to end on the upper left side of Lightning McQueen's tire.


