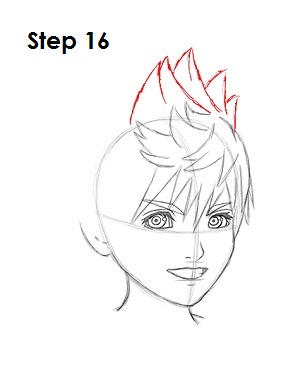
Step 16: Draw the four main spikes on top of Roxas' head. The two spikes on the left split in the middle for extra detail. Pay attention to the length and width of these spikes in relation to the other spikes, otherwise your Roxas drawing will look a bit weird. Use light strokes first to get the shapes right, then darken your lines.
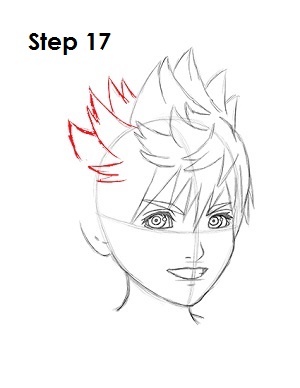
Step 17: Draw a few more of Roxas' hair spikes to the left. These spikes are a bit shorter than the ones in the previous step, but they still have a curve. Notice that the base or bottom of the spikes follow the path of the original balloon shape.
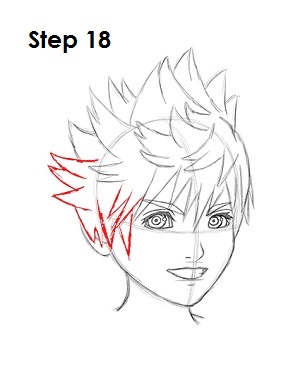
Step 18: Draw three more spikes with a horizontal orientation underneath. Then draw four more with a vertical orientation over Roxas' ear. These four spikes are similar to two letter W's.
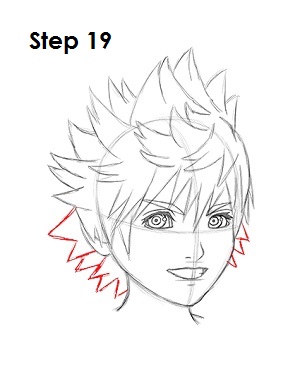
Step 19: Finally draw a few more spikes on the lower left side and right side of Roxas' head. These last spikes don't curve. They have pretty straight sides.
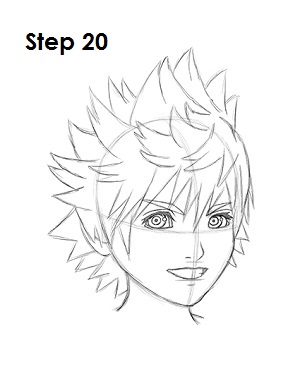
Step 20: That’s it! You now have a nice sketch of Roxas from the video game Kingdom Hearts. You can stop at this quick drawing for a rough, sketchy look or go for a more finished look by continuing to the next step.


