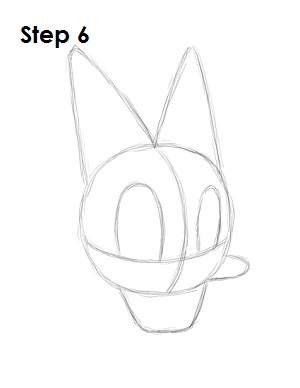
Step 6: That’s it for the initial sketch! You have the basic Daisy Duck shape. Now go in and tighten your drawing. From this point on, press harder with your pencil in order to get darker lines and a more defined sketch.
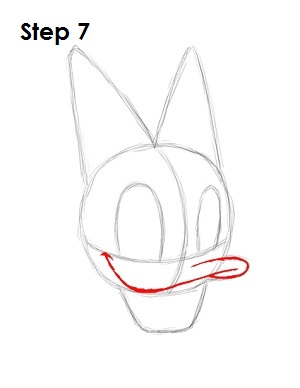
Step 7: Draw the top part of Daisy Duck's beak using the initial lines as guides. Darken the sideways U arc and extend the top part into the circle a bit more. Then draw a long line that starts on the left side of the left eye, dips down toward the bottom of the circle and ends on the right side inside the sideways U.
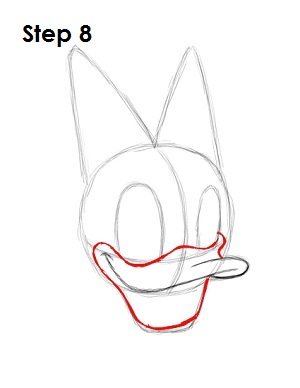
Step 8: Darken the lower part of Daisy Duck's beak. Extend the line on the left side to wrap around the smile and continue going to the right, making sure to then dip the line down when it gets to Daisy Duck's eyes. Draw a wavy line on the right side for the rest of the beak.
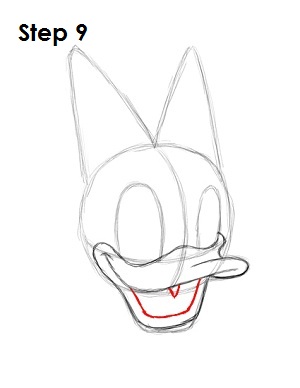
Step 9: Finish the bottom part of Daisy Duck's beak by drawing a smaller wide arc within the first wide arc and a small upside-down triangle on the top.
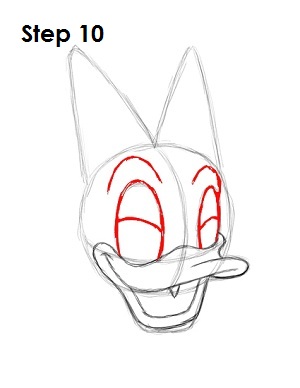
Step 10: Darken the arcs for Daisy Duck's eyes. Inside each eye, near the middle, draw a curved line for her half-closed eyelids. Above each eye, draw an arc for Daisy Duck's brow.


