
Use the video and step-by-step drawing instructions below to learn how to draw Ariel from The Little Mermaid. A new drawing tutorial is uploaded every week, so stay tooned!
Intro: Start drawing Ariel with a pencil sketch. In the beginning stages, don’t press down too hard. Use light, smooth strokes for sketching.
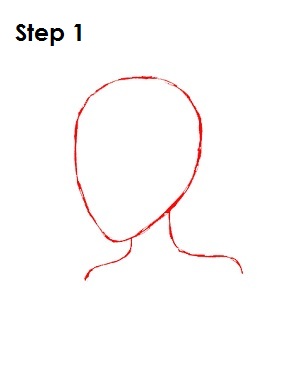
Step 1: To draw this Disney princess, start by drawing an egg shape that points down in the middle of the page. This is the basic shape for Ariel’s head. Add two curved, wavy lines that begin at the bottom of that shape and extend to the sides of the paper. These will be the basic shapes for Ariel's neck and shoulders.
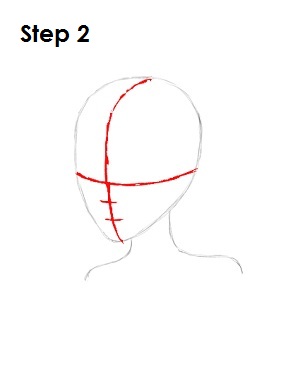
Step 2: Next, draw two intersecting lines across the egg shape, one vertical and one horizontal. When drawing the lines, bend them so they follow the contour of the shape. Draw two smaller lines in between the horizontal construction line and the bottom of the egg shape. These will be construction lines that will help you place Ariel’s facial features later on.
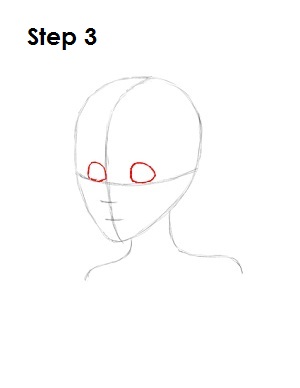
Step 3: On top of the horizontal construction line and on either side of the vertical construction line, draw two circles with flat bottoms for Ariel's eyes. Draw the circle on the left smaller because of perspective and should be slightly grazing the vertical construction line.
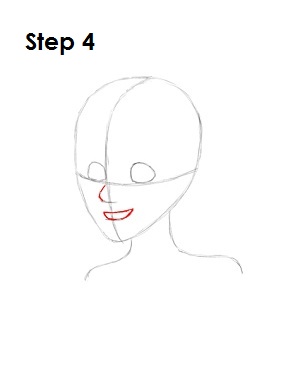
Step 4: Draw a basic guide for Ariel's nose by adding a curved line between the main horizontal construction line and the top of the two smaller lines. Below that, draw in her mouth that looks like a letter D on its side.
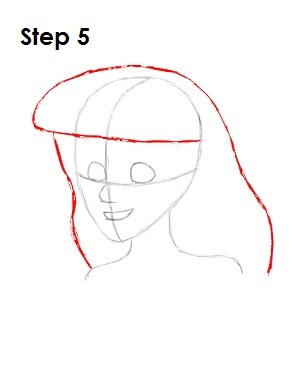
Step 5: Now draw guides for Ariel’s hair. Draw a very long curved line that starts on the right side of Ariel's head and moves left across her forehead. Continue drawing the line outside the left side of Ariel's head, make it go around the top of her head, and then draw it coming down the right side of her face and end it on top of the right shoulder. The left side of Ariel's hair is a simple curved line that starts from the bottom of her newly created hair to the top of the left shoulder.


