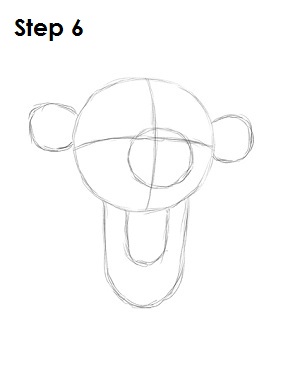
Step 6: That's it for the initial sketch of Tigger from Disney's Winnie the Pooh! You have the basic Tigger shape, so now go in and tighten your drawing. From this point on, press harder with your pencil in order to get darker lines and a more defined sketch.
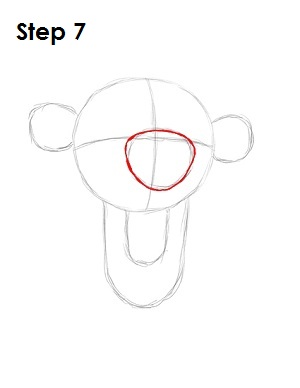
Step 7: Tighten the shape of Tigger’s nose by tapering the bottom part of the circle and giving it more of a rounded triangle shape.
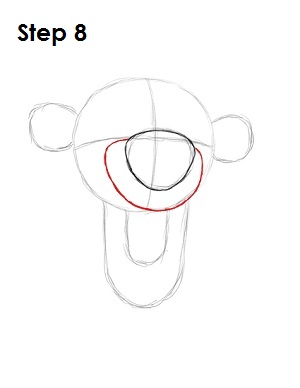
Step 8: Wrap a curve around the bottom part of Tigger’s nose to draw his snout. Draw the curve below the horizontal construction line and make it graze the main head shape on the lower right side.
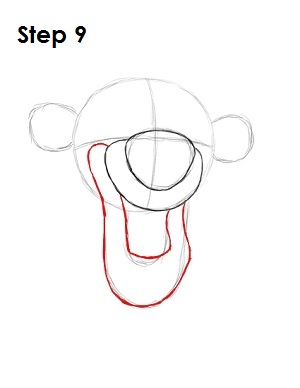
Step 9: Darken in Tigger’s lower jaw by using the two U-shaped curves as guides. When drawing the jaw, extend the left side of his mouth to the inside of the main circle to meet the left side of his snout. On the right side of his mouth, draw a small curvature to the right for a better shape.
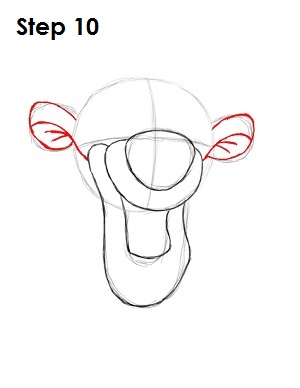
Step 10: Tighten the shape of Tigger’s ears by making them less round and more pointy at the top. Draw a line on each ear that begins on the inside middle and extends to his snout. Draw two lines in the bottom of the ear shape to indicate the inside of this cartoon character's ears.


