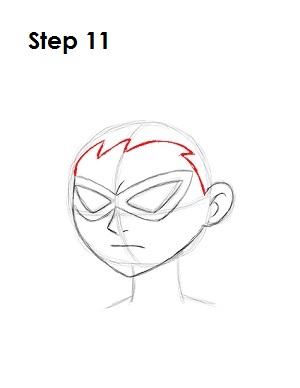
Step 11: Drawing Robin's hair is a bit tricky, so it's divided into two parts. Draw the front part of his hair first. It basically consists of a line that begins on the left side of his head on the top tip of the mask that moves to the right across his forehead in a zig-zag pattern and ends where the ear begins.
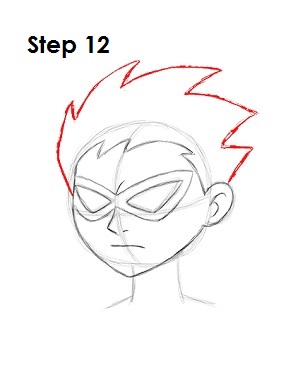
Step 12: The top of Robin's hair is similar, but the zig-zag spikes are taller. Start the line on the left side of his face below the left eye, then move up and draw a small spike followed by three big spikes and a smaller spike on the right that ends above Robin's ear.
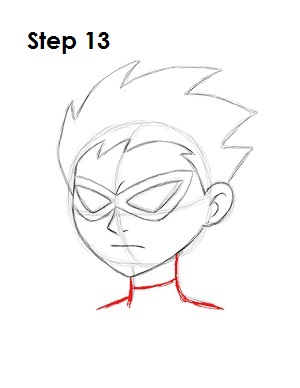
Step 13: Darken the initial guide lines to create Robin's neck. Draw a curved line inside the neck shape to indicate the collar of his costume.
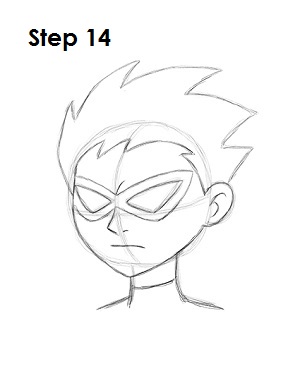
Step 14: That’s it! You now have a nice sketch of Robin from Teen Titans. You can stop at this quick drawing for a rough, sketchy look or go for a more finished look by continuing to the step below.
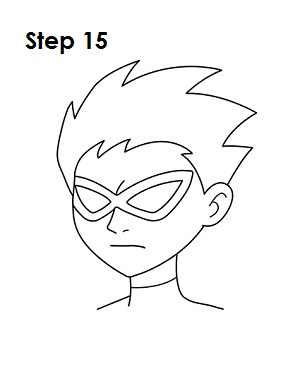
Step 15: For a more finished, inked look, carefully draw over the final sketch lines with a pen or marker. Wait for the ink to dry, and then get rid of every pencil mark with an eraser. You now have a finished inked drawing of Robin! You can stop here or go to the final step to complete your Robin drawing.
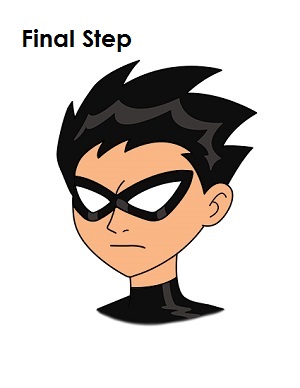
Final Step: For a completely finished Robin drawing, you have to color it. You can use markers, color pencils or even crayons! Color Robin's hair, mask and costume collar black. Add a gray zig-zag line across his hair to give it sheen. Add a few gray spots on the bottom part of the mask and on his neck to represent shine. Robin's skin is a peach color, but if you don’t have peach, improvise and use yellow-orange or light brown. Experiment! That’s it! You now have a completed drawing of the Robin from Teen Titans.
Thanks for visiting! Subscribe to the EasyDrawingTutorials YouTube Channel for a new tutorial every Sunday.
To learn how to draw animals, visit How2DrawAnimals.com.
RELATED TUTORIALS
 |
 |
 |
 |


