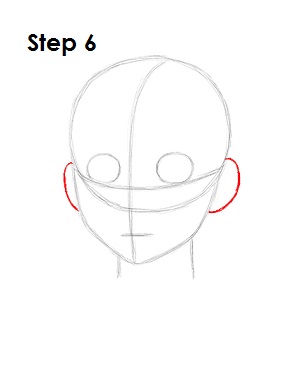
Step 6: On the either side of Aang's head, draw a curved line as guides for the ears. The top part of these lines should be near the ends of the horizontal construction line, and they should be similar to the letter C.
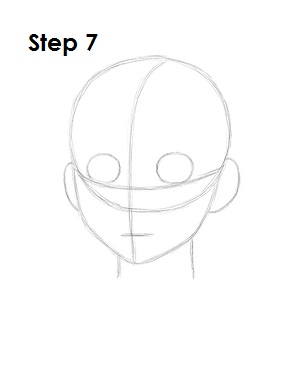
Step 7: That’s it for the initial sketch! You have learned to draw the basic shape of Aang from Avatar: The Last Airbender. Now go in and tighten your drawing. When learning how to draw Avatar Aang, the last airbender from this point on, press harder with your pencil in order to get darker lines and a more defined sketch.
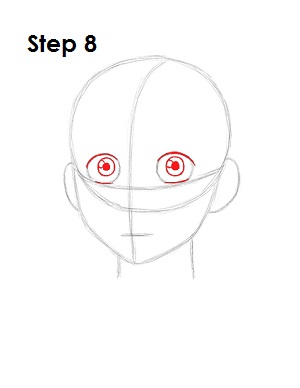
Step 8: Tighten the shape of Aang's eyes by darkening the top and bottom part of each circle. Inside each eye, draw a circle for this Avatar character's irises. Inside each iris, draw a smaller circle and shade it in for the pupils. Draw another small circle inside each iris on the sides to represent glare.
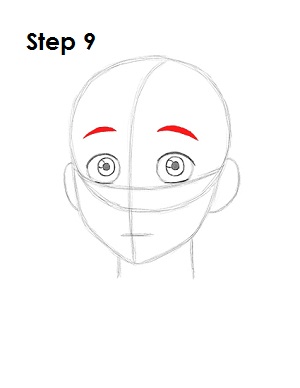
Step 9: For Aang's eyebrows, draw a thick line high above each eye that comes to a point at the sides.
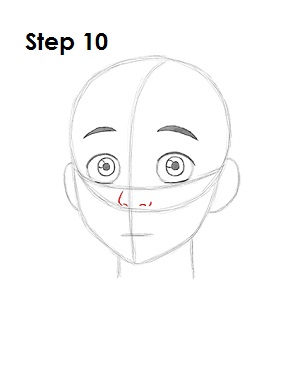
Step 10: Now learn how to draw Aang's nose. Place it under the horizontal construction line and above the bottom part of the main circle. Two small curved lines make up the nostrils, and two different-sized lines make up the sides of this Avatar character's nose.


