How to Draw a Cat:
A Step by Step Tutorial
This tutorial shows how to draw a cartoon cat using Animate CC drawing tools.
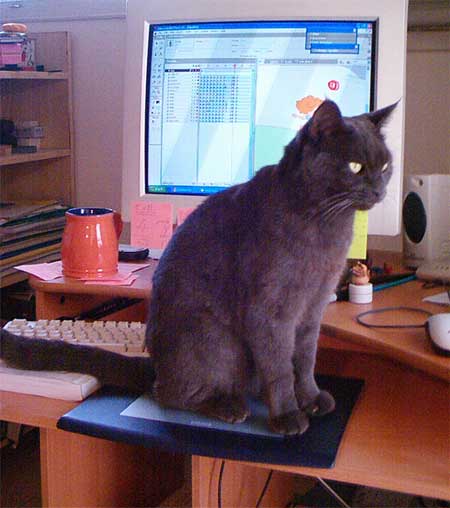
First, let’s study a real live cat:
 The flying animator's Russian Blue, using the Wacom tablet (gosh this is an old picture! look at the monitor LOL)
I like making a list of ingredients:
- General roundness
- Triangular ears
- 4 legs
- Tail – long, on the thin side
- Whiskers
- Cat eyes - slit pupils
- Fur
- Cat colors – gray-blue, ginger, white and so on
- Triangular nose, split upper lip
- Paws and Claws
The BIG SECRET is that not all of these items are necessary, as you can see in this article on famous cartoon cat characters - “how to draw a cat”.
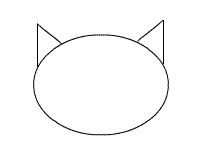
The absolute minimum needed to draw a cat are the Triangular ears:
Ok, let’s draw a cat:
Settings Checklist
- For this tutorial, make sure that the “Drawing Object” option is OFF (bottom of the tool box, when selecting a drawing tool).
- Create each part that we draw in a new layer, this will allow you to move them around freely.
- This design is without contours – disable the Stroke color when drawing shapes.
- Set a dark background color if you draw a light color cat.
Part 1 : How to Draw a Cat's Body
|
|
|
|
Head:
Select the Ellipse Tool, choose an orange fill color, and draw an ellipse. Ears: - Create a triangle using the PolyStar Tool. At the properties window you can select how many sides the polygon will have (options).
- Use the Selection Tool (the black arrow), to curve the sides of the triangle.
To do this, come near the side you wish to curve with the cursor, until a round line appears next to the cursor.
Then hold Left Click down, and push or pull away.
Let go of the mouse button when you reach the desired curve. - Rotate the ear using the Free Transformation Tool.
- Duplicate and rotate to the other side the second ear.
- Place ears at the sides of the top of the ellipse.
We will be using this technique through out this tutorial. Neck (optional step) : - Create a long narrow rectangle, using the rectangle tool.
- Use the black arrow (selection tool) to curve the sides, as we did the ears.
- Use this also to pull the corners of the shape – approach the corner of the rectangle with the cursor, until a “corner” appears next to the arrow. Left Click and hold down button, pull or push, then let go of the mouse button.
Body:
Draw a big triangle. Round it out as we did the ears. Leg: - Draw a rectangle; make it a shade lighter than the body.
- Curve the sides inwards.
- Pull the outer side top corner Down and Out.
- Duplicate and Flip (Modify - Transform - Flip Horizontal).
Paw: - Draw a circle in a color darker than the leg.
- Select the Line Tool, and draw a horizontal line across the circle in the same layer. This will cut the circle where the line crosses it.
- Select and Delete the bottom half of the circle.
- Double click the line to select all of it, and delete that too.
- Select the Line tool, select a dark color for the stroke, set Stroke Height to 2. Draw two lines to show the toes.
- Select entire paw, duplicate 4 times, and arrange at the bottom of the body and legs.
Tail:
Draw a tall thin rectangle, curve it out and curve the tip using the black arrow (selection tool).
|
Go To Part 2: Draw a Cat Face
Related Tutorials:
Learn to Draw People
How to animate a rabbit jump
 The flying animator's Russian Blue, using the Wacom tablet (gosh this is an old picture! look at the monitor LOL)


