How to draw Perspective with a
Single Vanishing Point
When you learn how to draw perspective, it's best to start with a single vanishing point.
This means, that we will draw the lines converging for only one of the three dimensions of space – and treat the other two as simple parallels.
Now that you've read the Theory on Drawing Perspective, putting the lines on paper is a lot easier :-)
Take a drawing pad and a pencil, and find a long corridor (the longer the better).
Follow the steps shown in the Flash Tutorial below - navigate using the arrows on the bottom left side.
Read the detailed instructions for each step in the text that follows.
Please read them first!
Steps 4 to 7 especially go together and although they are described as separate steps, they all happen together.
Don't miss the important tips at the end!
Step 1

Stand in the middle of the corridor, and look to the far end.
Step 2
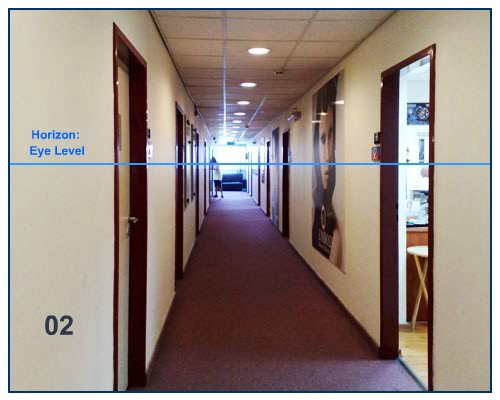
See if you can see the horizon. If it’s an open corridor, you might see the real horizon line. If not, you need to see the imaginary line where top meets bottom.
BIG CLUE: The horizon is precisely at your eye level.
Because that’s what it is – it’s an imaginary line (the Earth never really touches the Sky :-))
Let's Start Drawing:
Step 3
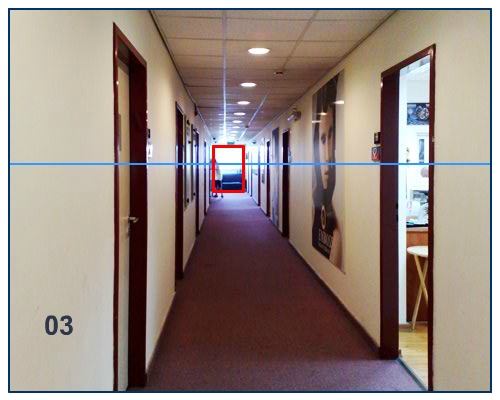
On your drawing paper, mark a line that represents your eye level.
I draw it in the middle of the page – mid way between top to bottom- because that’s where my eye level is. I’m 1.5 meters tall, standing in a 3 meter high corridor, so my horizon is more or less in the middle.
If you sit on the floor – draw the horizon closer to the ground.
If you’re Michael Jordan – draw the horizon high up on the page – to match your eye level.
Draw a rectangle that describes the far end of the corridor.
- Match it to the horizon.
- If it’s a door – and your eyes (your horizon) is 2/3 of the way up – place the rectangle at the same relative height - 2/3 below the horizon.
- Draw it small enough so as to leave room for the rest of the corridor!
Be careful with the proportions:
- Is it taller than wider?
- By how much?
Step 4
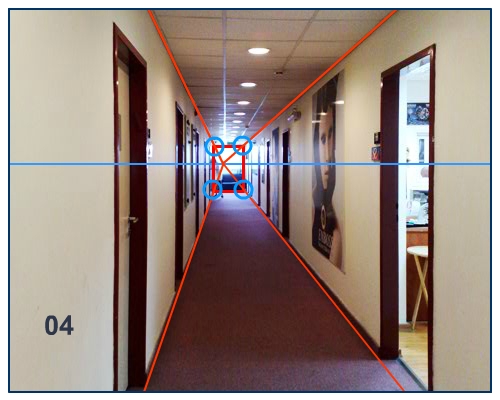
Now draw all the lines that describe where:
- Floor meets Wall
- Wall meets Ceiling
This is how you do it:
Draw a straight line that starts at the vanishing point, and goes through one of the corners of the rectangle.
Draw one line for each corner.
If you got the proportions right, then you already have the main structure of your corridor!
Step 5
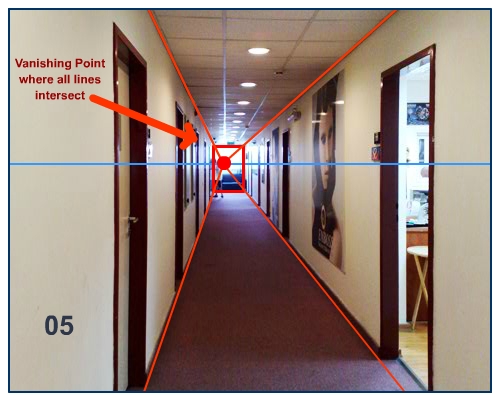
All the lines that start from where you stand, and go down the corridor, will converge to the same point.
It’s the same as the rail way tracks.
That’s the vanishing point.
Step 6
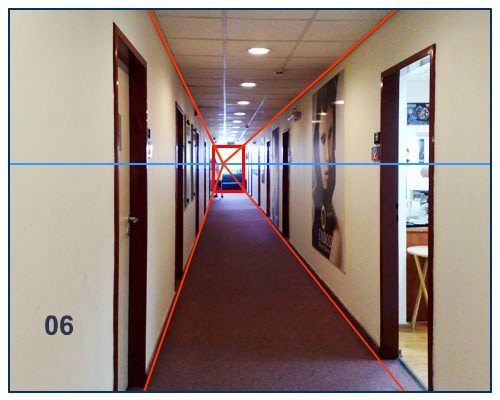
We now have a set of lines showing 3 dimensions:
- If X is the length of the corridor,Y is the width, and Z is the height of the ceiling, then:
- X is converging to the vanishing point
- Y and Z are frozen in simple parallel state, and do not converge.
Step 7
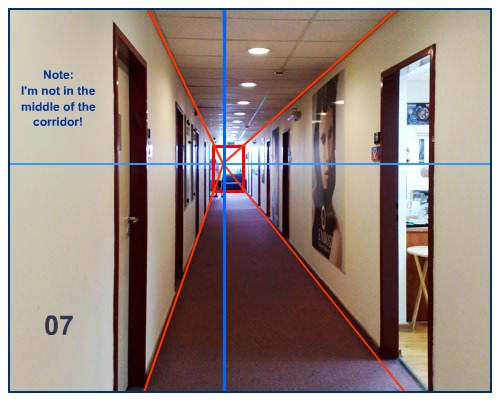
Note that you’re probably not standing in the middle of the corridor.
The Vanishing Point is where YOUR middle intersects with the horizon.
Now take a moment to look at the corridor.
Look at each line that you see that you wish to draw, and ask yourself
“Which dimension (Height, Width or Depth) does this line belong to?”
Then draw it accordingly.
Step 8
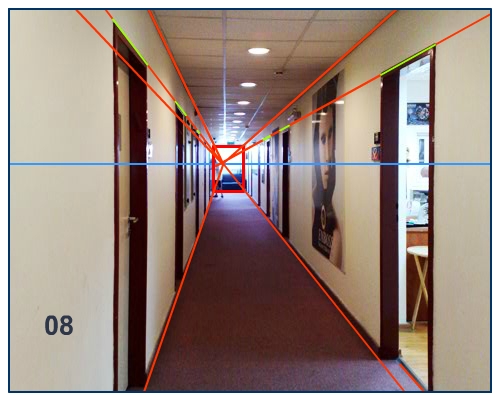
If it’s on the X axis – draw it converging to the dot on the horizon.
Steps 9 + 10
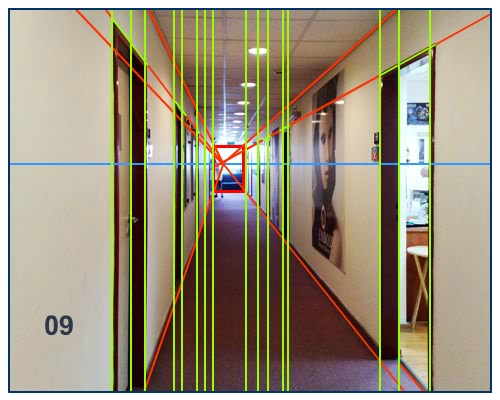
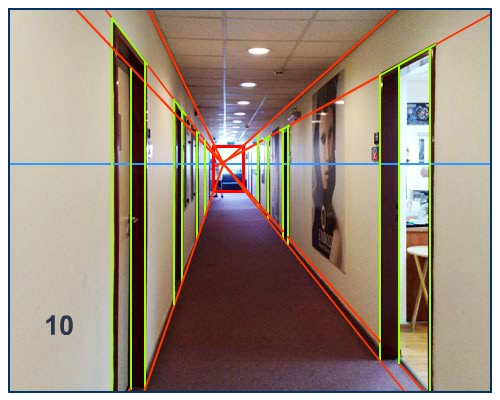
Z – draw it straight up from top to bottom – parallel to the sides of the page.
Steps 11 + 12
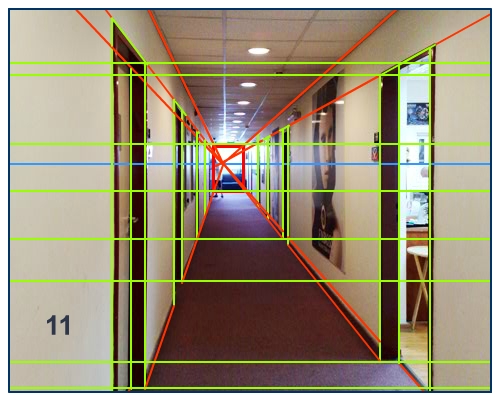
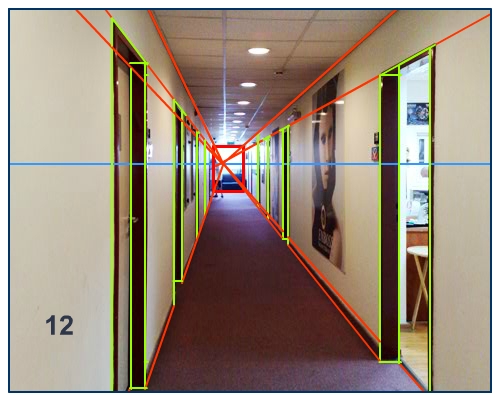
If it’s On Y – draw it parallel to the floor
Steps 13 + 14
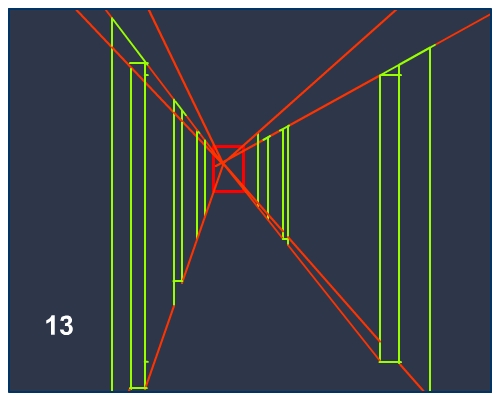
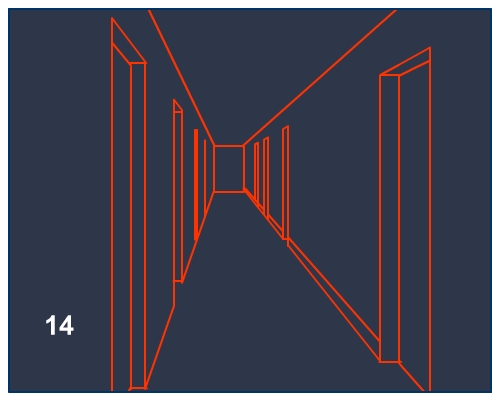
Work out the shape of your corridor.
Avoid these classic problems:
- Y and Z lines are not parallel and at 90 degrees to each other, but are drawn at odd angles
- Some people draw only the bottom half of the world.
This is an entirely psychological phenomenon. If you look at your drawing and realize you put the horizon at the top of the page and you only drew the world from the floor to eye level – start another page and consciously put the horizon and vanishing point in the middle. Force yourself “to see” the top half of the corridor. - Everything looks as if drawn from above, from a high bird-view angle.
In a way it’s the opposite of the previous bullet.
This is also purely in the mind. One of our brains’ favorite shortcuts is to assume that we see everything from above. It is mostly true – we rarely see things from the bottom!
So be aware of this when you draw, and try to explain to yourself what it is that you see, before you put it on paper. Verbally - talk to yourself while you draw. I'm not kidding. You'll be amazed at the result.
Think of all the Visual Cues –
Who is in front of who?
Which part of the object is bigger?
It helps a lot.
Once you get the hang of the single-vanishing-point, try drawing objects with 2, 3 and 4 vanishing points.
Have Fun!
Drawing perspective: How does our brain perceive depth?
Home > Learning to draw > Draw single vanishing point perspective
Figure Drawing Journal:
In This Section
Basics:
More Drawing Tuts:
anatomy- the movement of the spine
drawing perspective with a single vanishing point

